Setting up Entra (Azure AD) as an Identity Provider
Follow the steps below to set up Entra (Azure AD) as an Identity Provider.
Overview
Azure Active Directory allows an authorized application to integrate with it via an abstraction called a "Registered Application". In this guide, we will extract three values we need in order to connect Aserto to Azure AD:
Tenant ID: this is the AAD tenant that you wish to import data fromClient ID: the identifier for the registered application we will createClient Secret: the secret associated with the registered application
Create an Azure AD Registered Application
To create a registered application, open your Azure Portal, click on "Azure Active Directory", and then in the left nav, click "App Registrations".
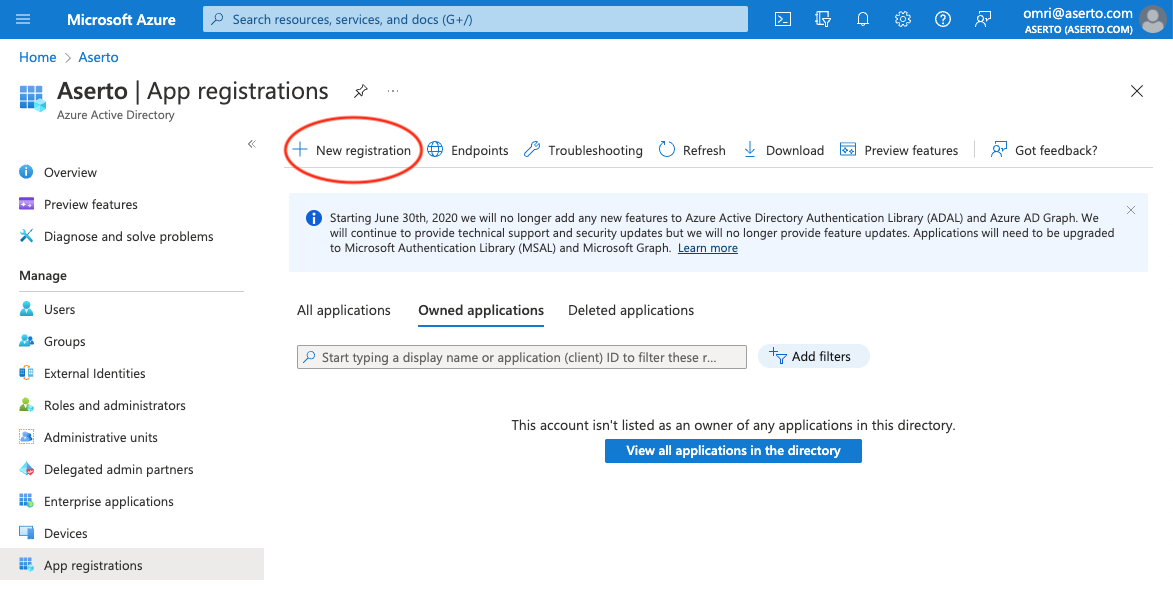
Click the "+ New Registration" button.
Register the application
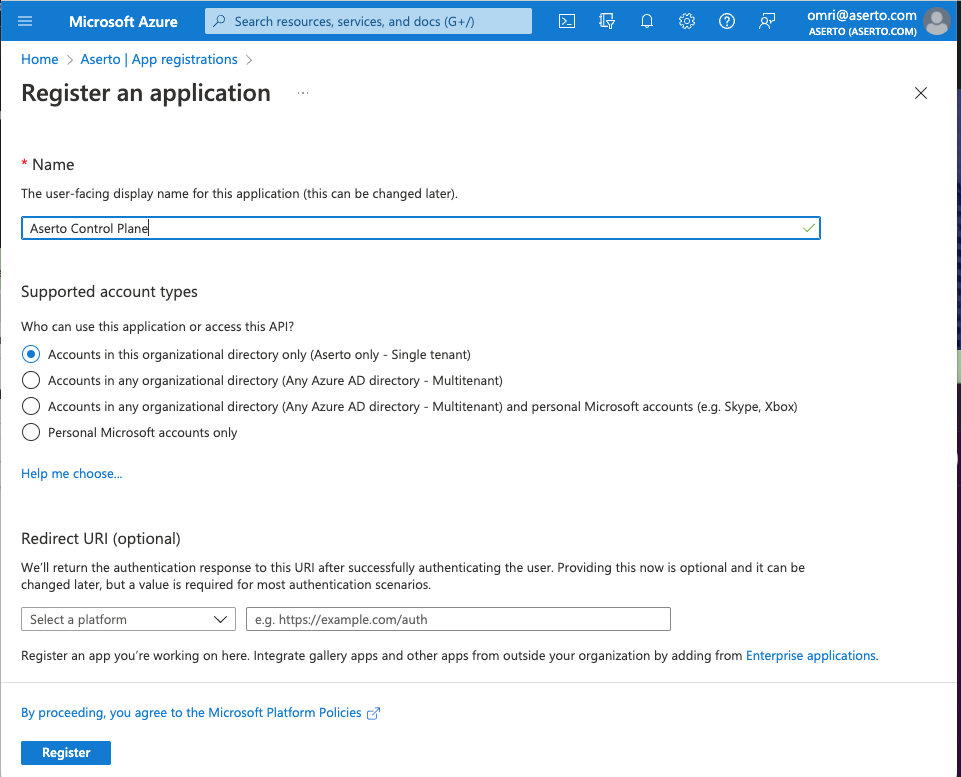
In this screen, name the application "Aserto Control Plane" and under "Supported account types", select the radio button titled "Accounts in this organizational directory only".
You can leave the Redirect URI empty.
Then click the "Register" button.
You will now see the newly registered application.
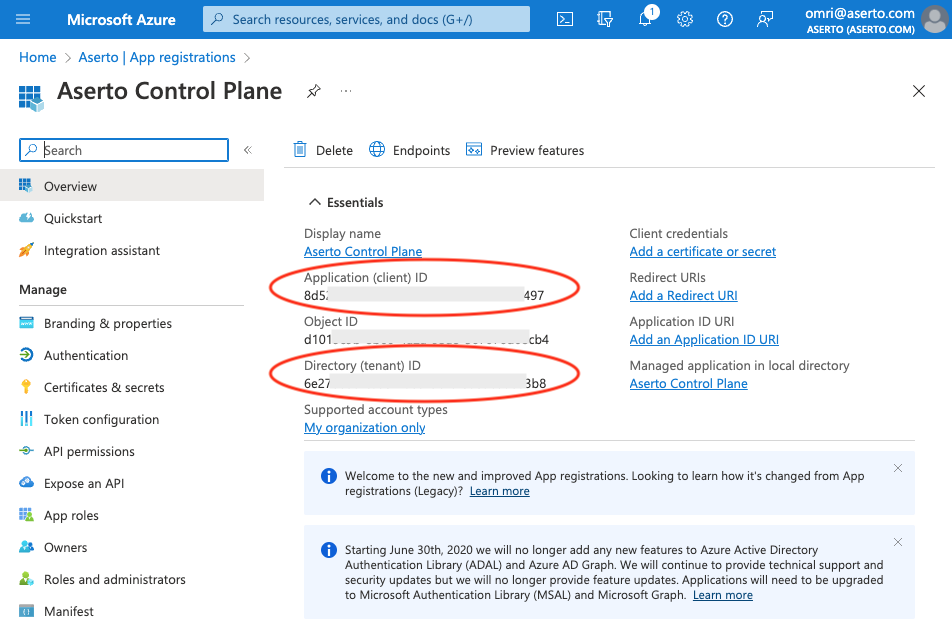
Copy the values labeled "Directory (tenant) ID" and "Application (client) ID" from this screen. These are the first two pieces of information we will need.
The "Directory (tenant) ID" is the Tenant ID.
The "Application (client) ID" is the Client ID.
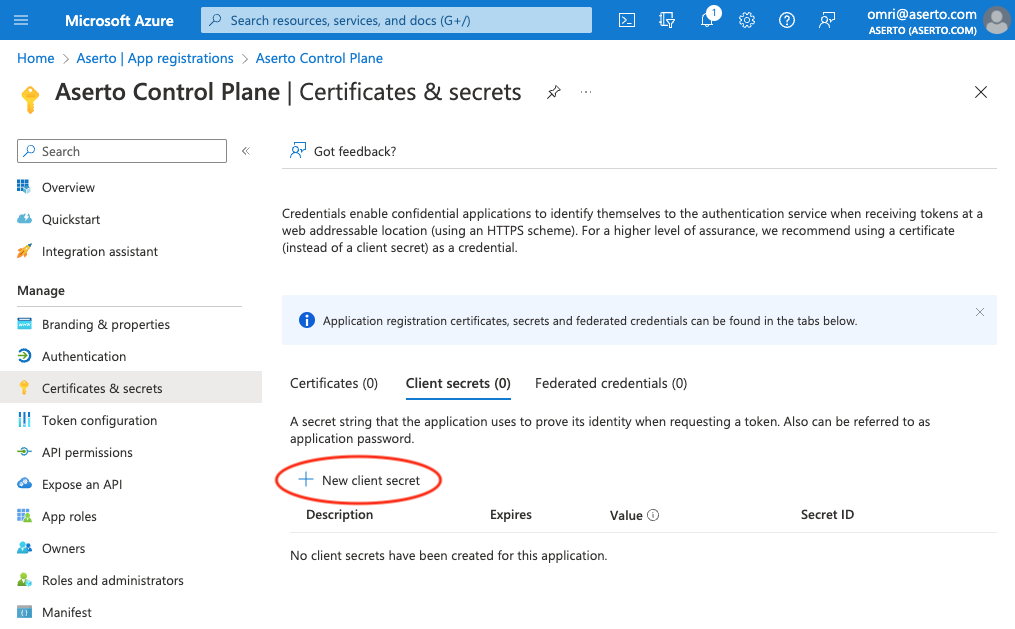
Create the Client Secret
Next, click the "Add a certificate or secret" link in the top-right position of the "Essentials" tab.
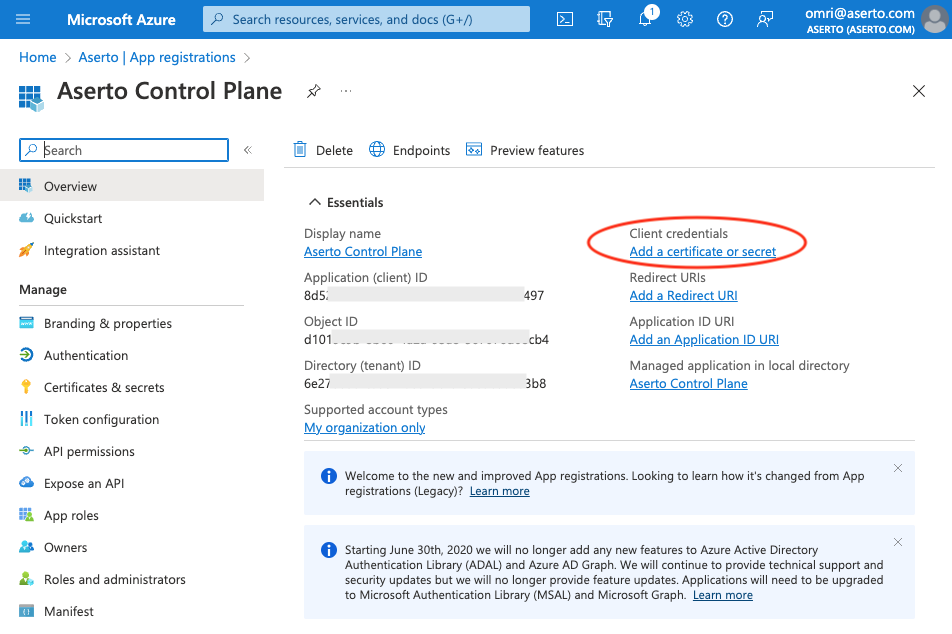
Then, click the (+ New client secret) button to create a new secret.
Add a client secret
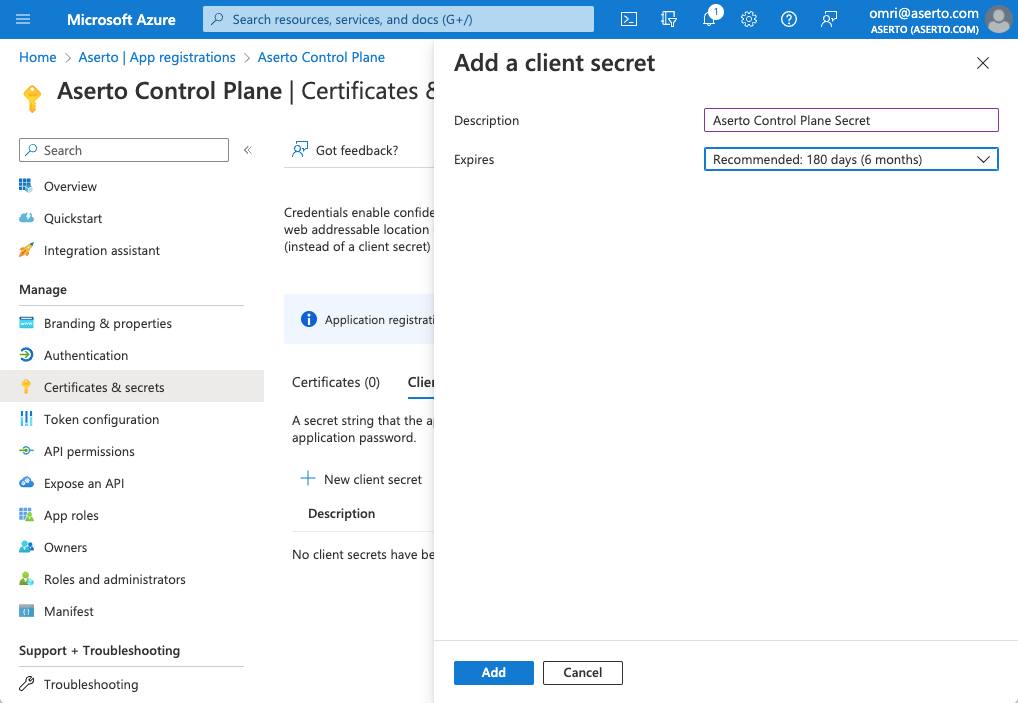
Give the secret a friendly name ("Aserto Control Plane Secret") and choose the appropriate lifetime for your organization. Then click the "Add" button. You'll now see the created secret.
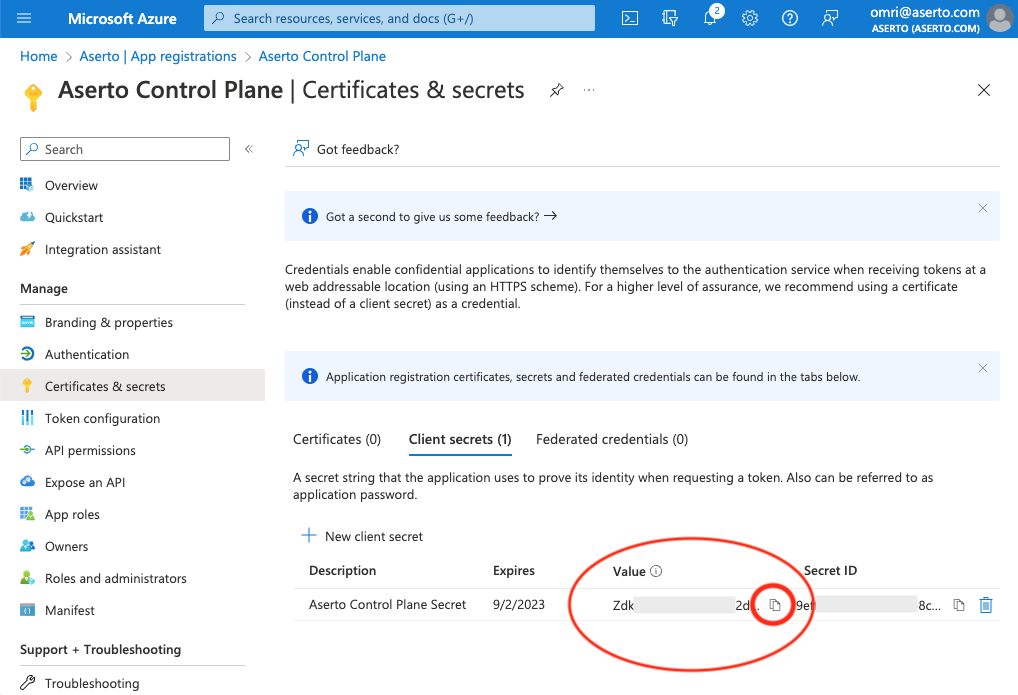
Copy the value of the Client Secret. This is the third piece of information you'll need to connect Aserto to Azure Active Directory.
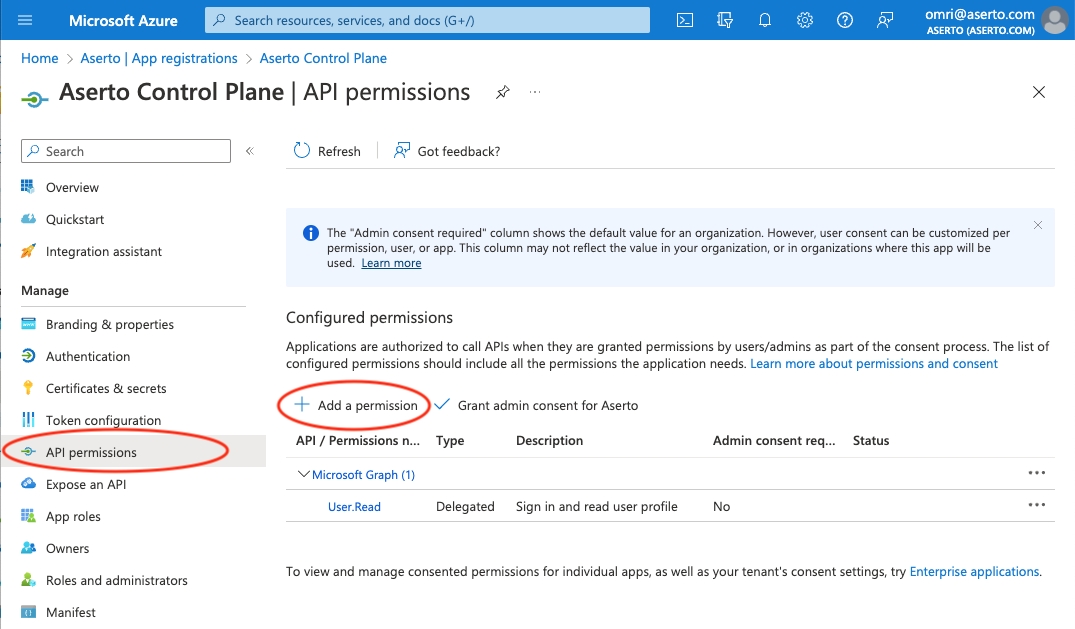
Grant permissions to the application
Aserto needs the User.Read.All permission to import users from Azure AD.
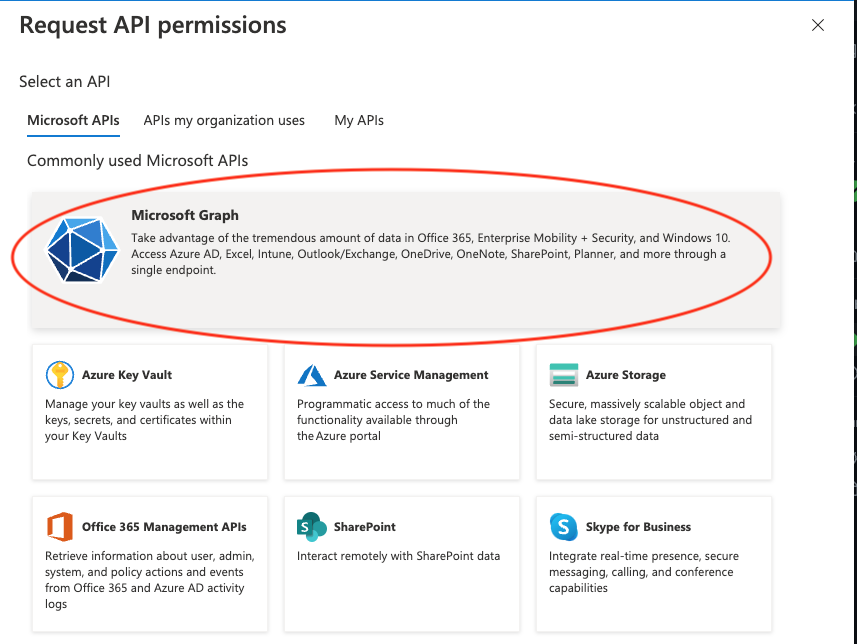
Click the "API permissions" tab in the left navbar, and then the "+ Add a permission" button.
Next, select the "Microsoft Graph" API.
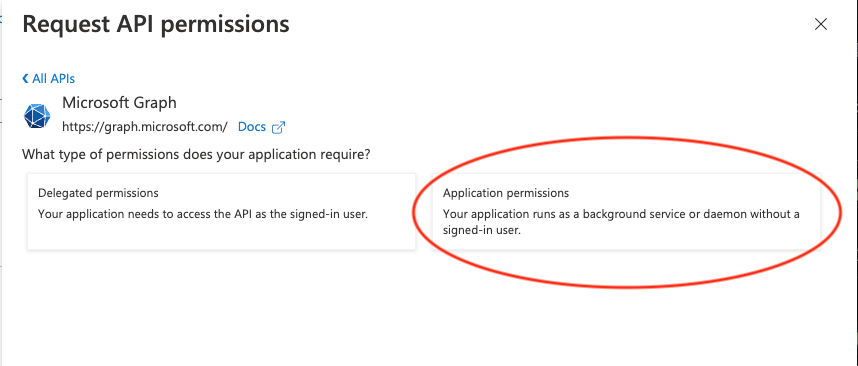
Then select the "Application permissions" option.
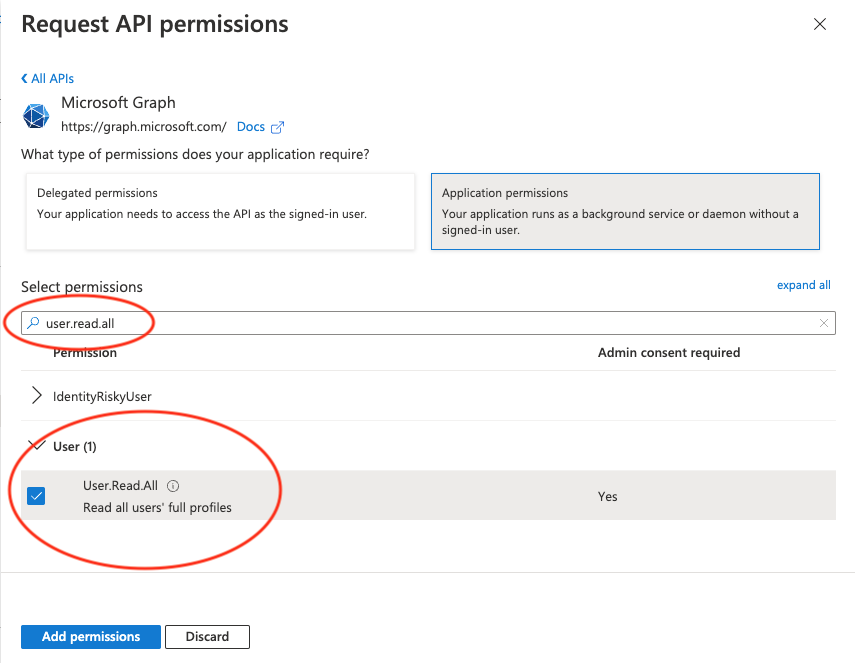
Select the permission
Filter for the User.Read.All permission and select it. Then click "Add permissions".
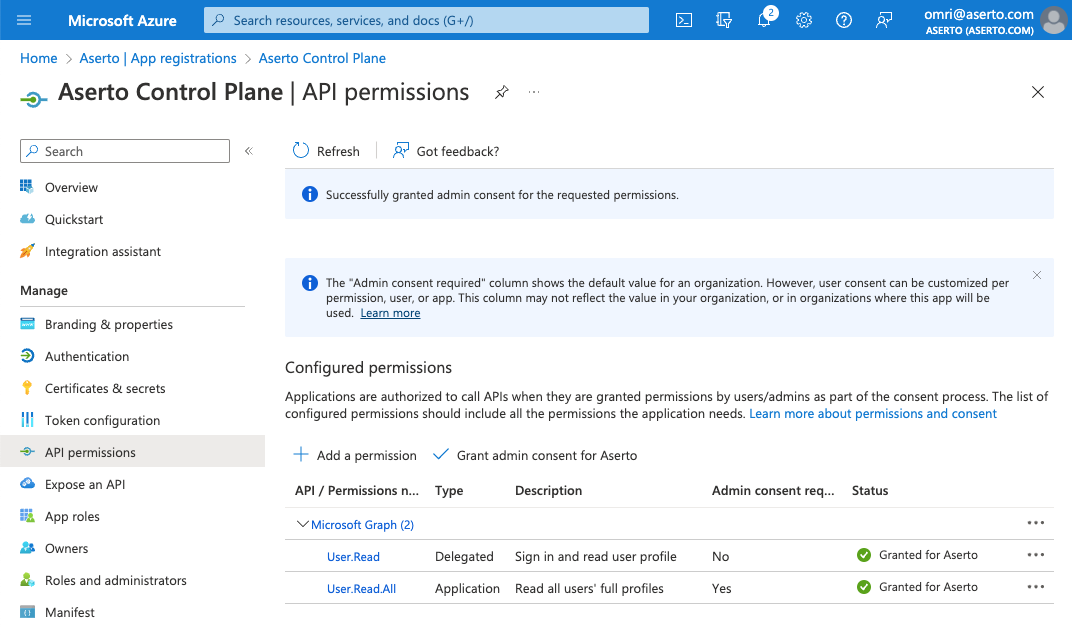
Grand admin consent
To grant consent, you need to be an admin. Click the "Grant admin consent for [your-tenant]" button. Then click "Yes".
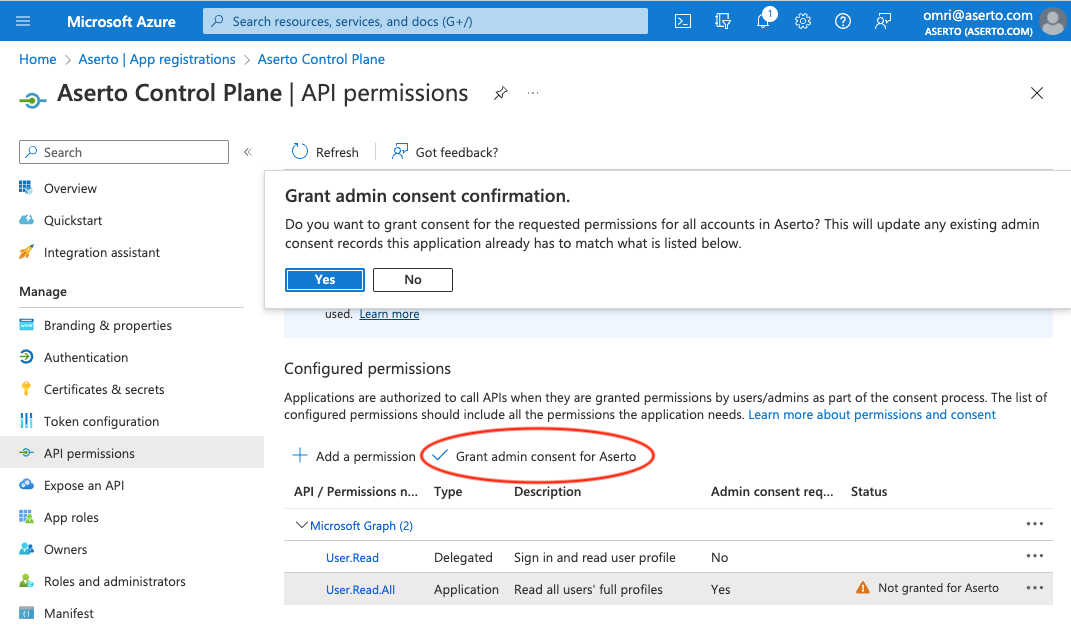
Finally, you should see that the User.Read.All permission is now granted.
Connect Azure AD to Aserto
With the Tenant ID, Client ID, and Client Secret, we can now create an Aserto Connection.
Create an Azure AD connection
Next, connect Azure AD to Aserto as an identity provider. Head to the Aserto console and open the Connections tab.

In the Connections tab, click the "Add a Connection" button. In the following screen, use the "Azure AD" provider. Name the connection "azure-ad" and use the display name "Azure AD". Then, paste the Tenant ID, Client ID, and Client Secret you retrieved from the Azure Portal into their corresponding fields.

Finally, click the "Add connection" button to save the connection. Aserto will now automatically sync your Azure AD users to the Aserto directory.