Update the application
To test this endpoint we're going to have to make sure the React app actually sends the authentication token to the server and requests the protected resources. To do that, we'll have to make some changes to the App.js file in our React app.
At the top of the file, modify the line :
import React, { useEffect } from 'react'
to:
import React, { useEffect, useCallback, useState } from 'react'
Then, find the following code block:
function App() {
  const auth = useAuth();
  const isAuthenticated = auth.userData?.id_token ? true : false;
And add the following code right after the definition for the isAuthenticated variable:
const [message, setMessage] = useState(false)
const accessSensitiveInformation = useCallback(async () => {
  try {
    if (!auth.isLoading) {
      const accessToken = auth.userData?.id_token
      const sensitiveInformationURL = `${process.env.REACT_APP_API_ORIGIN}/api/protected`
      const sensitiveDataResponse = await fetch(sensitiveInformationURL, {
        headers: {
          Authorization: `Bearer ${accessToken}`,
        },
      })

      try {
        const res = await sensitiveDataResponse.json()
        setMessage(res.secretMessage)
      } catch (e) {
        //In case no access is given, the response will return 403 and not return a JSON response
        setMessage(sensitiveDataResponse.status)
      }
    }
  } catch (e) {
    console.log(e.message)
  }
}, [auth.isLoading, auth.userData?.id_token])
In this portion of the code we create a callback (which will be triggered by a button). The callback will first get our JWT token from the identity provider, using the auth object that is obtained from the useAuth hook. Then we perform the call to our service sending the authorization token as part of our request's headers (fetch).
Finally, we parse the JSON response from the server and set the state of the message variable: if the service returns a 403 Forbidden or a 401 Unauthorized errors, and the message “No access to sensitive information” will be shown. If no error is returned from the service, the user has access to the protected resource and the message will be shown.
Next we’ll update the main section of the app (in the div with the className main) to include the button that will trigger accessSensitiveInformation and an area to show the message. Replace the existing div with the class main section with the following:
<div className="main">
  {isAuthenticated && (
    <>
      <div className="top-main">
        <div className="welcome-message">
          Welcome {auth.userData?.profile?.email}!
        </div>
        <div>
          {!message && (
            <button
              className="primary-button"
              onClick={() => accessSensitiveInformation()}
            >
              Get Sensitive Resource
            </button>
          )}
          <div className="message-container">
            {message && message !== 403 && message !== 401 && (
              <>
                <div className="lottie"></div>
                <div className="message">{message}</div>
              </>
            )}
            {message && message === 401 && (
              <>
                <div className="sad-lottie"></div>
                <div className="message">
                  No access to sensitive information
                </div>
              </>
            )}
            {message && message === 403 && (
              <>
                <div className="sad-lottie"></div>
                <div className="message">
                  No access to sensitive information
                </div>
              </>
            )}
          </div>
        </div>
      </div>
    </>
  )}
</div>
Test the application
To run both your application and the server in parallel, add the npm-run-all dependency: cd into the project's root folder and run:
yarn add npm-run-all
Then, update the package.json in the root folder, and add the following to the scripts section:
"scripts": {
   ...
   "start:server": "node service/api.js",
   "start:all": "npm-run-all --parallel start start:server"
 },
First, stop the application by hitting ctrl+c in the terminal where you previously started the application. To start both the application and the server, you can now run:
yarn start:all
Let's test our application by first logging out, then logging in again with the email euan@acmecrop.com and the password V@erySecre#t123!.
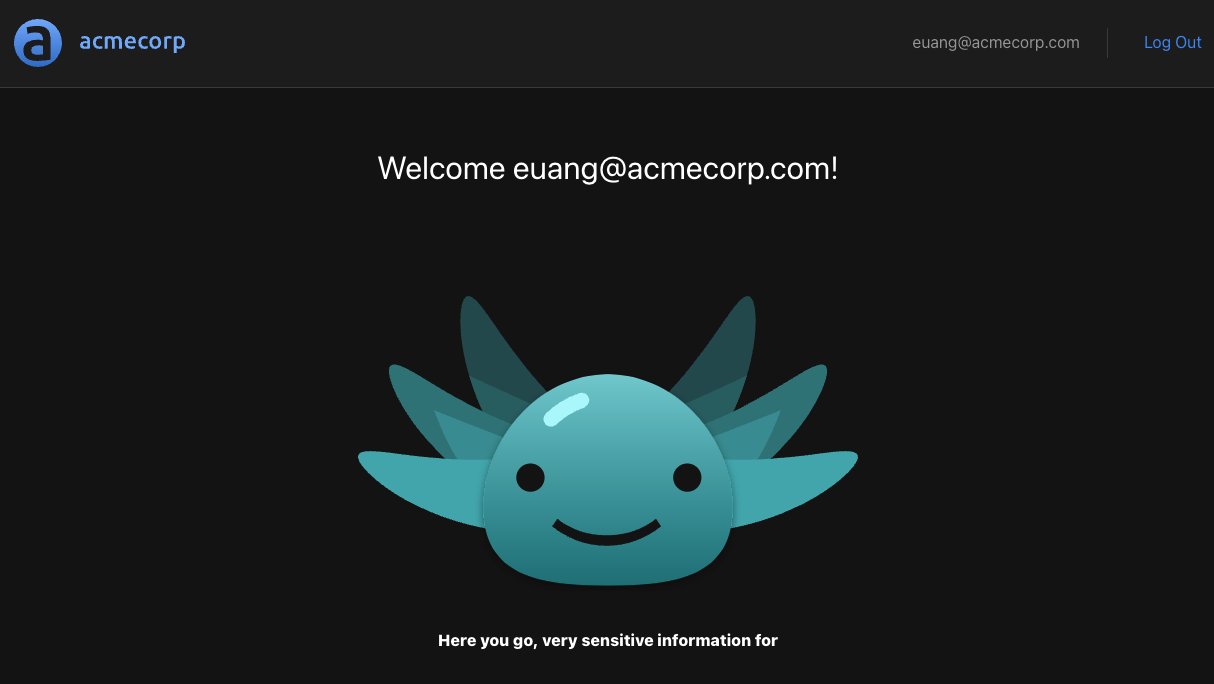
If everything works as expected, we should see the following:
We can further test this by intentionally sending a malformed header and making sure the sensitive information isn't shown. One way to do this is to append so rogue characters to the access token like so:
...
const sensitiveDataResponse = await fetch(sensitiveInformationURL, {
   headers: {
       Authorization: `Bearer ${accessToken}SOME_ROGUE_CHARACTERS`,
   },
});
In this case we'd expect the "No access to sensitive information" message to be shown.

Checkpoint
At this point, we have successfully implemented the authentication flow in our React application. We can now move on to the next step: creating an authorization policy that will govern how users access our protected endpoint.