Creating a Role Based Access Control Authorization Model
Until now, we dealt only with authentication of users in our application. Now, let’s discuss how to set up the authorization model which will enforce some limitation on user access to our protected resource. We want to limit access to the protected resource in our application only to users who have particular roles.
As we saw before in the Aserto Directory, the user Euan (euang@acmecorp.com) has the viewer role, and the user Kris (krisj@acmecorp.com) has the admin role. Right now, if you log in as Euan user you’ll see the following:
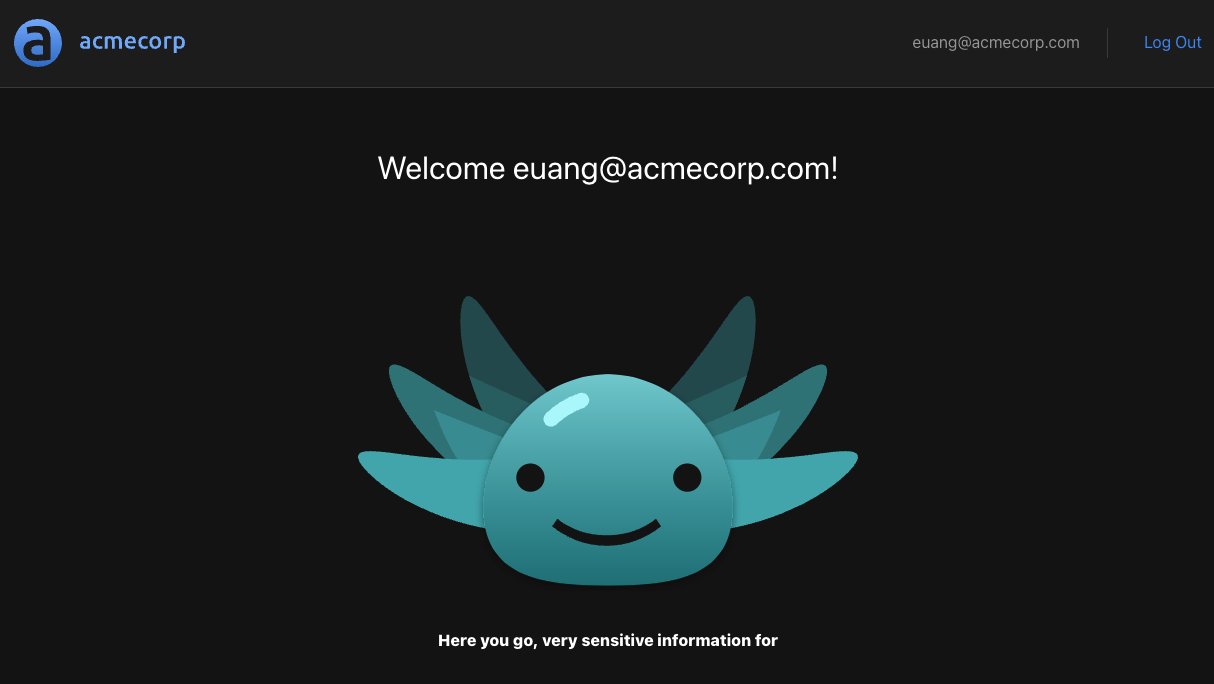
We want to ensure that if we're logged in as Euan (a viewer), the application won't allow access to our protected resource. Since we didn't add any way to authorize users based on their role - all users will have access to the protected resource. Let's fix that by first creating a simple Aserto policy to allow access only to users with the admin role. We'll then use this policy in our application.
Create an Aserto Policy
Initially, the policy we’ll create for this tutorial will only allow a user with the role of admin to access our protected resource, while users without the admin role will not be able to access that resource.
You can choose your own adventure - if you'd like to speed things up and just create the final policy from a template instead of creating it from scratch, follow the steps below.
Create the final policy instance from a template
Let's create a running policy instance from a template. Note this will use an existing policy image, which means it's read-only and you won't be able to evolve it. Not to worry - if you'd like to go back and create and modify your own image, you can come back to this section and choose the other path.
In console.aserto.com, go to the Policies tab and click the "Create an instance" button.

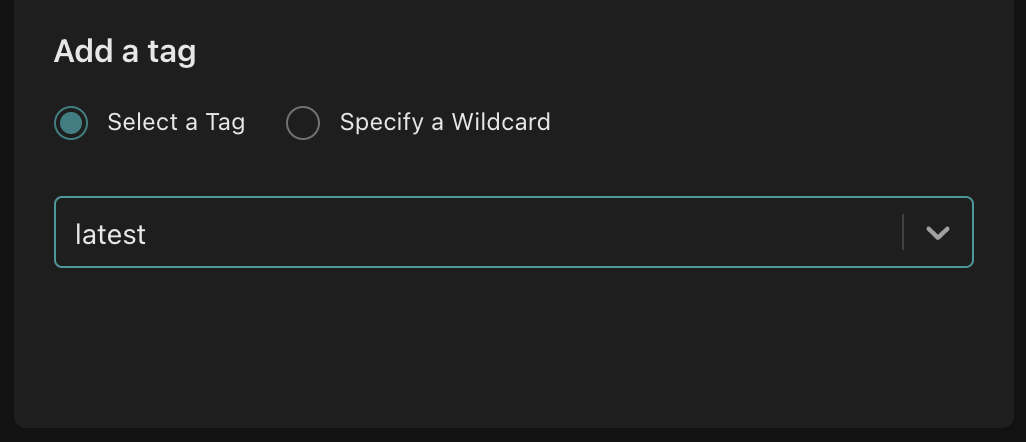
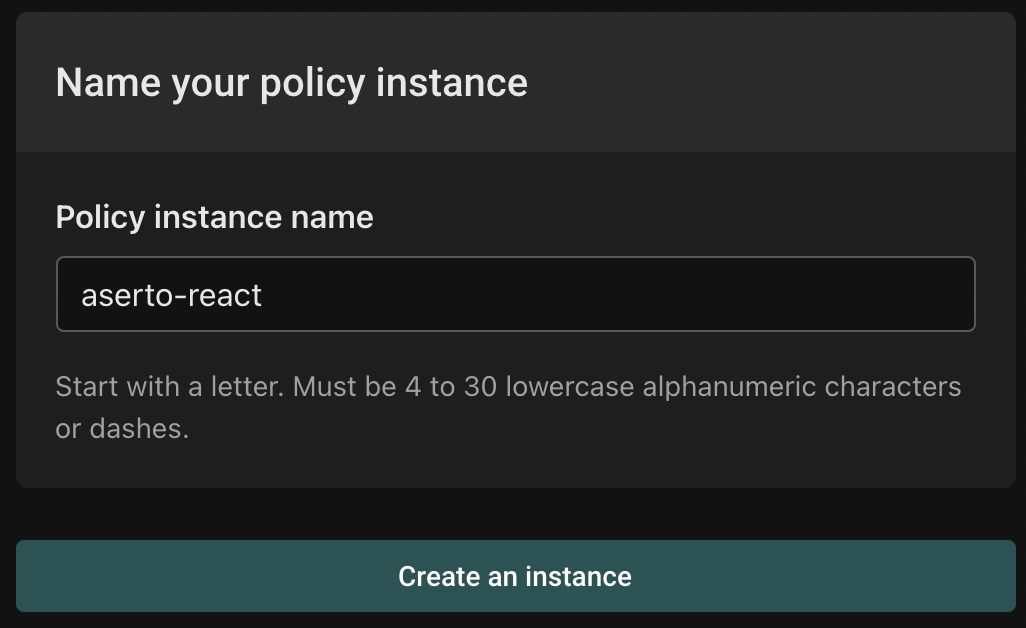
Choose "...from a sample image", and select policy-aserto-react from the dropdown. Choose the latest tag, and use the name aserto-react.
Finally, click the "Create policy" button.
That was easy! We now have a policy that will only allow users with the admin role access our protected resource. You can now skip to the next section, where we'll see how to reference the policy in our Express.js service.
Do it step by step, and learn about the policy language
In console.aserto.com, go to the Images tab and click the "Create a new image" button.

When you click on "Create a new image", you'll be able to choose between using a policy template and creating an empty policy repository:
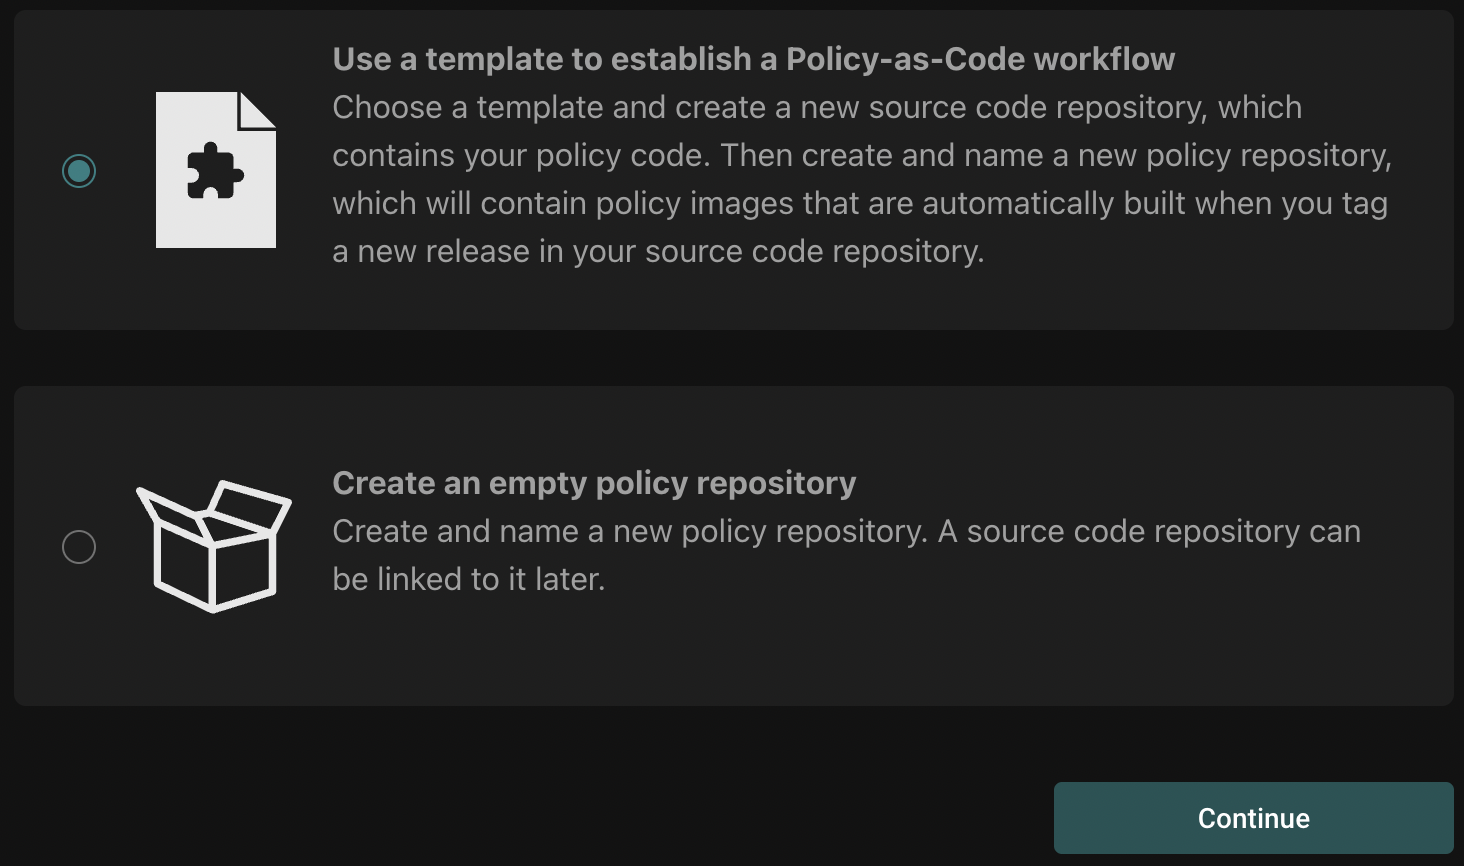
Select "Use a template" and click "Continue".
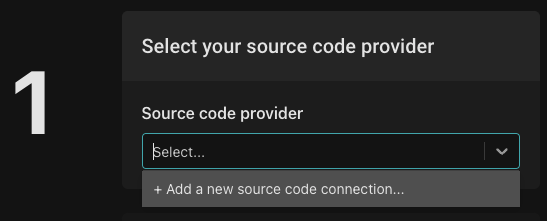
Next, you'll go through a short workflow to select a git repository for your policy, and name that policy in the Aserto console.
If you haven't already added a source code connection, select "Add a new source code connection". You can choose either adding a GitHub connection using an OAuth2 flow, or add a GitHub connection using a GitHub PAT.
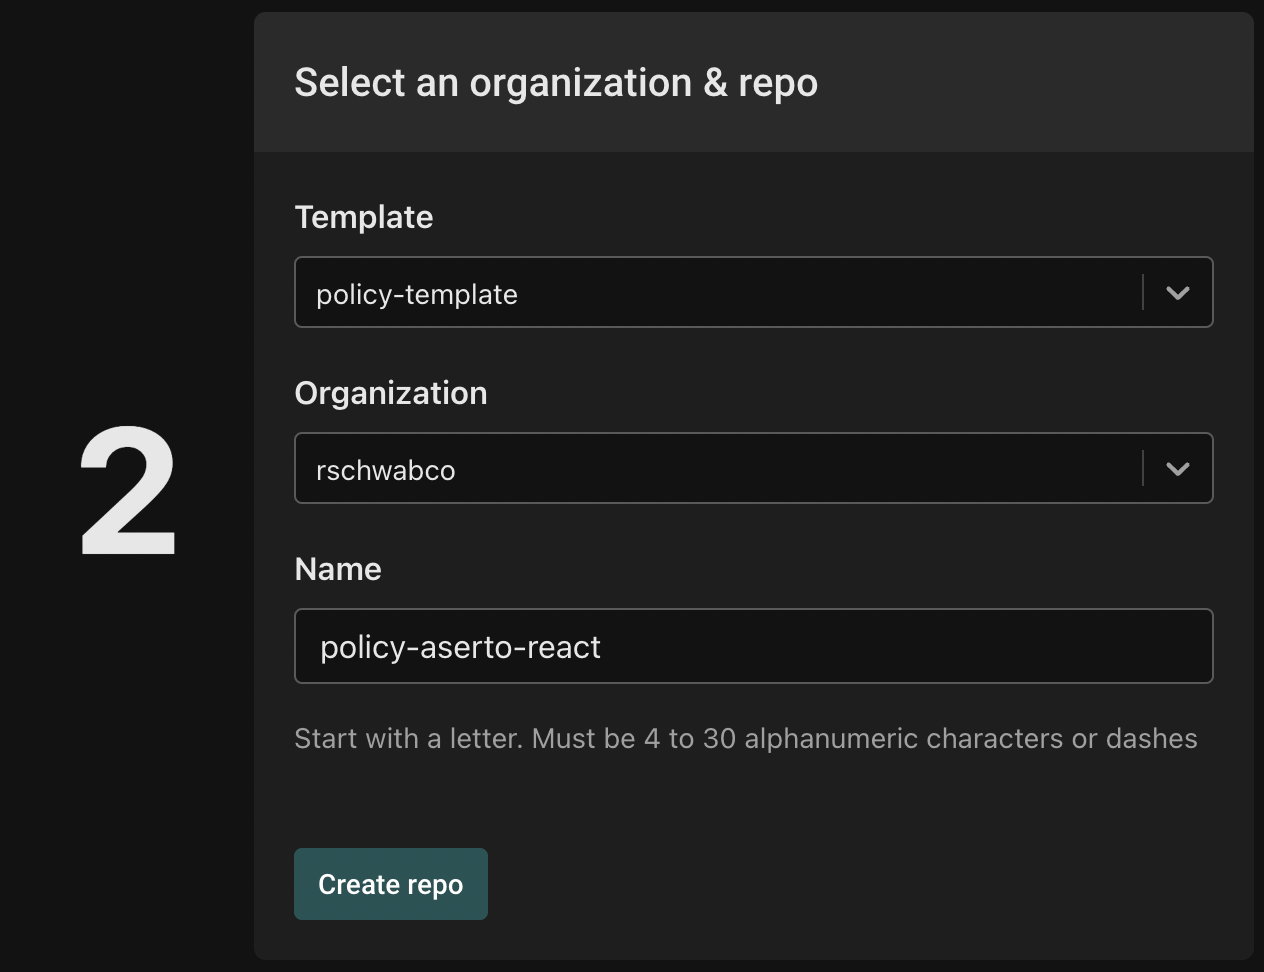
Once you've added the connection, select the organization you'd like to use for the repository. Then, from the template dropdown, select "aserto-dev/policy-template". Name repo "policy-aserto-react", and click "Create repo".
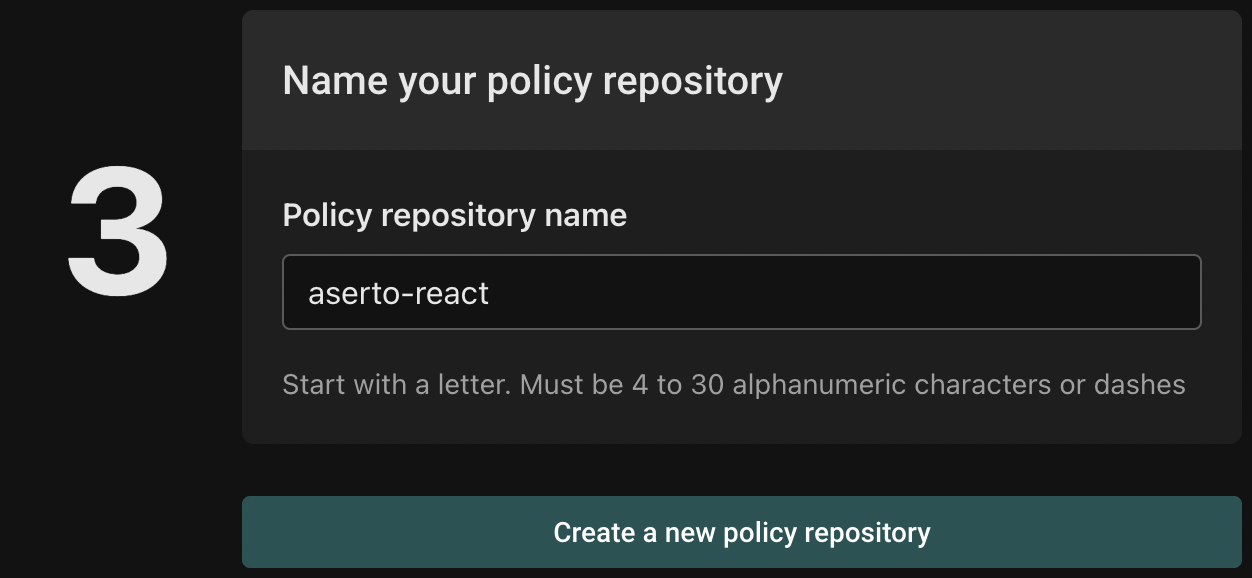
Finally, name your policy repository "aserto-react" and click "Create a new policy repository".
Aserto will generate a new repository in your GitHub account the will include the necessary policy files. Head to GitHub to retrieve the URL for the repository that was just created, and clone it.
git clone git@github.com:<YOUR ORGANIZATION>/policy-aserto-react.git
Now that we have a local copy of the policy, let’s start modifying it:
We'll start by updating the .manifest file under src. We'll change it from
{
    "roots": ["policies"]
    ...
}
To
{
    "roots": ["asertodemo"]
    ...
}
Rename the file hello.rego to protected.rego. We'll open the file and change the package name to match the path of our Express API endpoint. The basic structure of the package name is:
[policy-root].[VERB].[path]
Where the path is separated by dots instead of slashes. And so in our case, the Express.js path
app.get('/api/protected'...
Is referenced in the package as:
package asertodemo.GET.api.protected
We're also going to define the policy such that the only allowed user is one with an admin role. Aserto attaches this user object to the input object. Below is the finished policy:
package asertodemo.GET.api.protected

default allowed = false

allowed {
	some index
	input.user.properties.roles[index] == "admin"
}
By default, the allowed decision is going to be false - this follows the principle of a “closed” system where access is disallowed unless specific conditions are satisfied.
At runtime, the application will send the JWT associated with the logged in user. The Express.js service will relay the JWT along with the request path as the identity and resource contexts respectively to the authorizer.
The some index and ...roles[index] expressions indicate the authorizer will iterate over all the elements in the roles array under the properties in the user object. The authorizer will check if the iterated role is equal to the string admin. If it is, the allowed decision will evaluate to true.
Updating the Policy Repository
Now that we’ve modified our policy, we’ll publish our changes: Aserto applies a GitOps flow to any changes made to the repository we set up. That means that we can simply tag and push the changes we’ve made to the policy and the updated policy will be built and published to the policy instance.
Commit, tag and push the changes you made:
git add .
git commit -m "updated policy"
git push
git tag v0.0.1
git push --tags
Open the Aserto console, and navigate to the Registry tab. Then, open the policy "hello-aserto-react" and review the changes. You should see the following:

Create a policy instance
To set up a policy instance, head to the Policies tab and click the "Create an instance" button:
Next, you'll be prompted to select a policy registry:
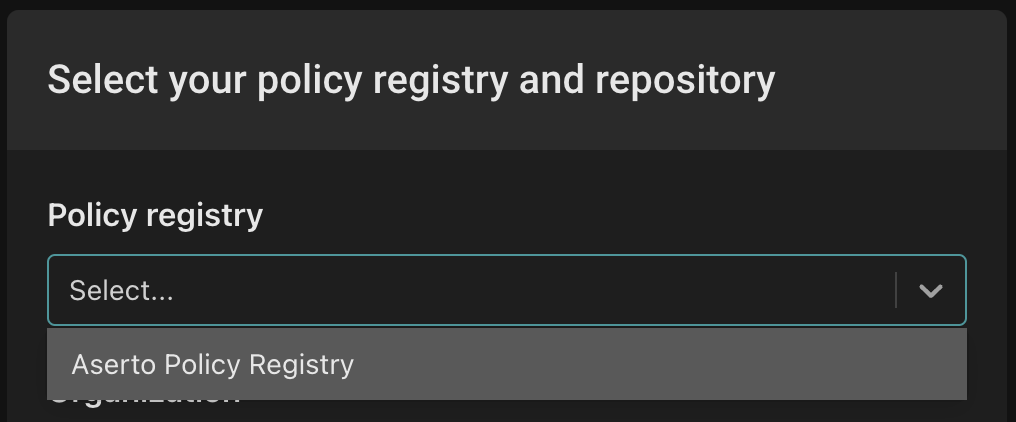
Select "Aserto Policy Registry" from the dropdown.
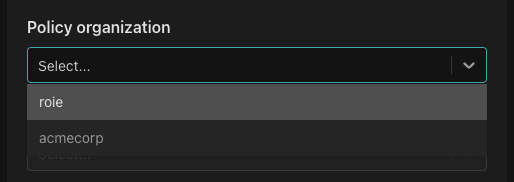
Next, from the "Select organization" dropdown select your personal (account) organization.
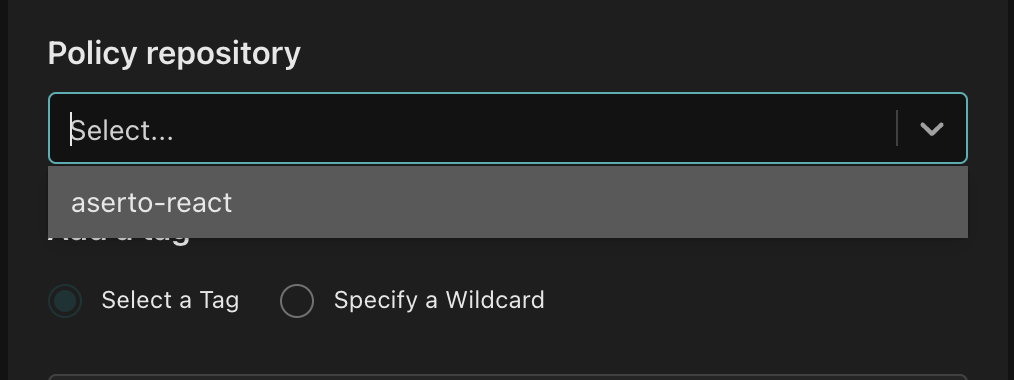
From the "Policy repository" dropdown, select "aserto-react".
From the "Tag list" dropdown, select "latest". This sets up the policy instance to always pick up the latest version of the policy. While this is going to be very useful while we are developing the policy - we would probably choose to lock the policy instance to a specific tag in a production environment.
Finally, name your policy instance aserto-react and click "Create an instance".
Checkpoint
Great! We now have a policy that will only allow users with the admin role access our protected resource. In the next section we'll see how to reference the policy in our Express.js service.