Overview
This Quickstart walks through an example scenario and demonstrates how the Aserto Directory can be used to implement multi-tenant Role-Based Access Control (RBAC).
Consider a simple inventory management application. An online store consists of multiple departments and different employees can have different kinds of roles within each department. The application distinguishes between three roles:
viewer: Grants read-only access to the department information.member: In addition to viewer privileges, members have permission to view all the data, add new products to the catalog, and set the number of available units on existing products.owner: Owners have all member privileges and can also delete products and manage user roles in the department.
To model the scenario in the Aserto Directory we will create a new object type called department. We will also
create three relation types to represent the owner, member, and viewer roles.
Once the type definitions are in place, we will create a department object for each department in the store
and create relations between users and departments to indicate their role membership.
With the directory populated, the application can perform authorization decisions by checking whether a relation of the right type exists between a user attempting to act on a department and the department object.
In the following pages we'll walk through the process of implementing this data model using the Aserto Directory API.
Prerequisites
In order to follow this guide and run all the examples you first need to:
- Have an Aserto account. If you haven't created one yet, head over to aserto.com and create one now.
- New accounts already have a connection to the Citadel IDP and will display the five Citadel users.
If you don't see them, follow the remainder of the steps below.
- Log in to the Aserto Console.
- Select the "Directory" section in the main navigation bar.
- Click the "Connect an identity provider" button to display the "Add a connection" dialog.
- From the "Provider" drop-down menu, select "Demo Citadel IDP".
- Type "citadel" in the "Name" box and click "Add connection".
- Within a few seconds, the "Directory" section will be populated with a few users.
Running Examples
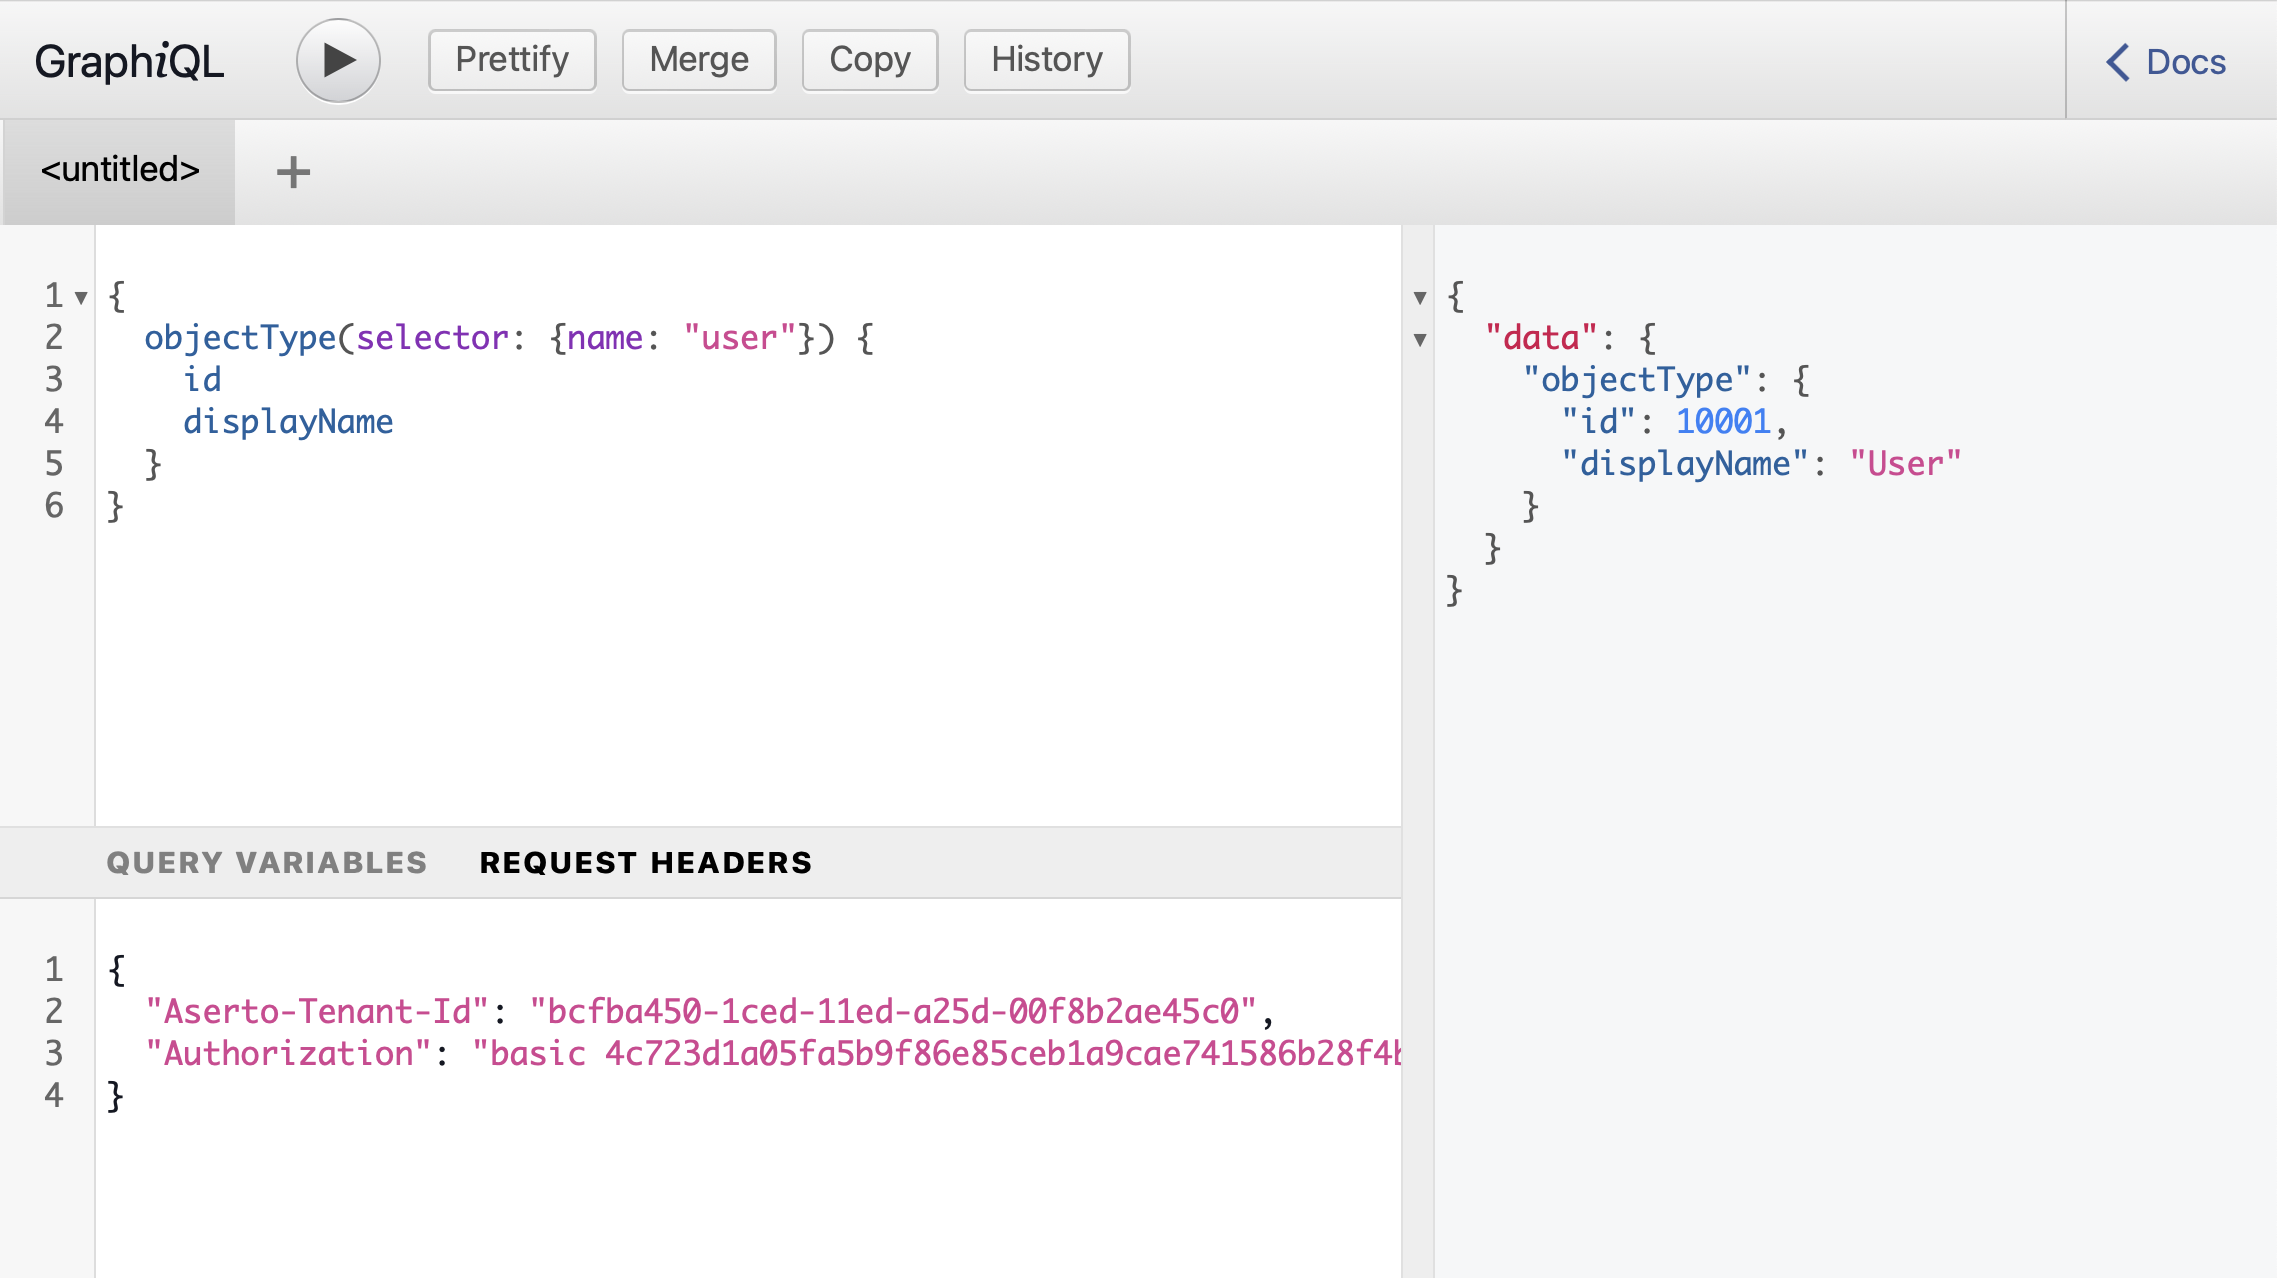
You can follow the guide and run the examples against your directory by using the directory's GraphiQL Playground.
When calling the directory API, be sure to include the required authentication headers in your requests.
Add HTTP headers in the GraphiQL Playground as a JSON object in the "Request Headers" section beneath the code editor.