Add Users to the Aserto Directory
Since our application deals with user access, we're going to need users in our directory. Aserto lets us add identity providers and automatically syncs the users registered with those identity providers to the Aserto directory and authorizer. In this tutorial we’re going to use the Acmecorp Identity Provider, which simulates an identity provider with hundreds of users, each with their own set of properties.
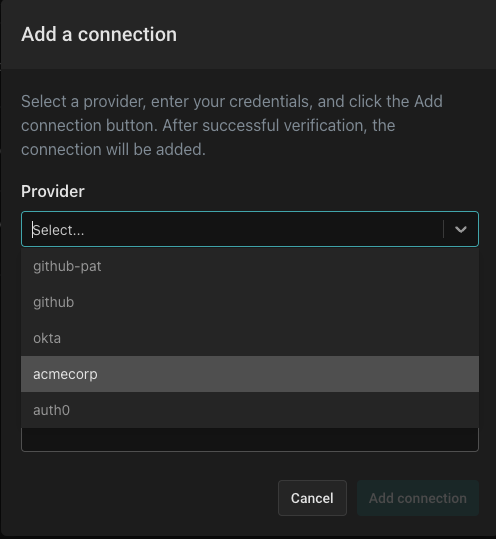
Log in to your Aserto account. To add the Acmecorp identity provider, go to the Connections tab, and click “Add connection”.

From the dropdown, select “acmecorp”:

Name the provider (you can choose whatever name you want) and give it a description. Then, click “Add connection” to complete the process.
Review your Users
Click on the "Directory" tab. The users you’ll see have been imported from the identity provider Acmecorp into your directory. Let’s review a couple of users: Search the directory for Euan Garden and click on his user card.

You’ll see the following JSON object (shortened here for brevity):
{
  "displayName": "Euan Garden",
  "email": "euang@acmecorp.com",
  ...
  "properties": {
    "department": "Sales Engagement Management",
    "manager": "2bfaa552-d9a5-41e9-a6c3-5be62b4433c8",
    "phone": "+1-804-555-3383",
    "title": "Salesperson"
    "roles": [
      "acmecorp",
      "sales-engagement-management",
      "user",
      "viewer"
    ],
    ...
  },
  ...
}
Users in this identity provider have properties and roles associated with them. In this case, among other roles, Euan has the role of a viewer. If you search the Aserto directory for the user Kris Johnson and inspect her associated JSON object, you’ll see she has the role of admin. Later in this tutorial we will leverage these roles to allow the authorizer to make a decision as to which user will have access to a piece of sensitive information.
But first, we'll set up our React application. Let's get started!