Policy Lifecycle
Aserto's Control Plane helps manage the policy lifecycle.

Author
Policies are comprised of a collection of .rego files and .json files, which provide static data that can be part of the policy.
Build, tag and publish Policy images
The set of source files that comprise a policy are built into a Policy Image using a set of tools that are modeled after the docker toolset. You can build and tag a policy just like you build and tag a docker image.
There are two paths for managing the lifecycle of a policy image:
- Using the
policyCLI directly to build, tag and push a policy image to a policy registry. - Using a policy-as-code workflow in GitHub or GitLab, a build action automatically builds, tags, and pushes a new version of a policy image when the source repository is tagged with a new tag.
policy CLI
Login
policy login -s <PATH-TO-REGISTRY> -u <USERNAME> -p <APCR_API_KEY>
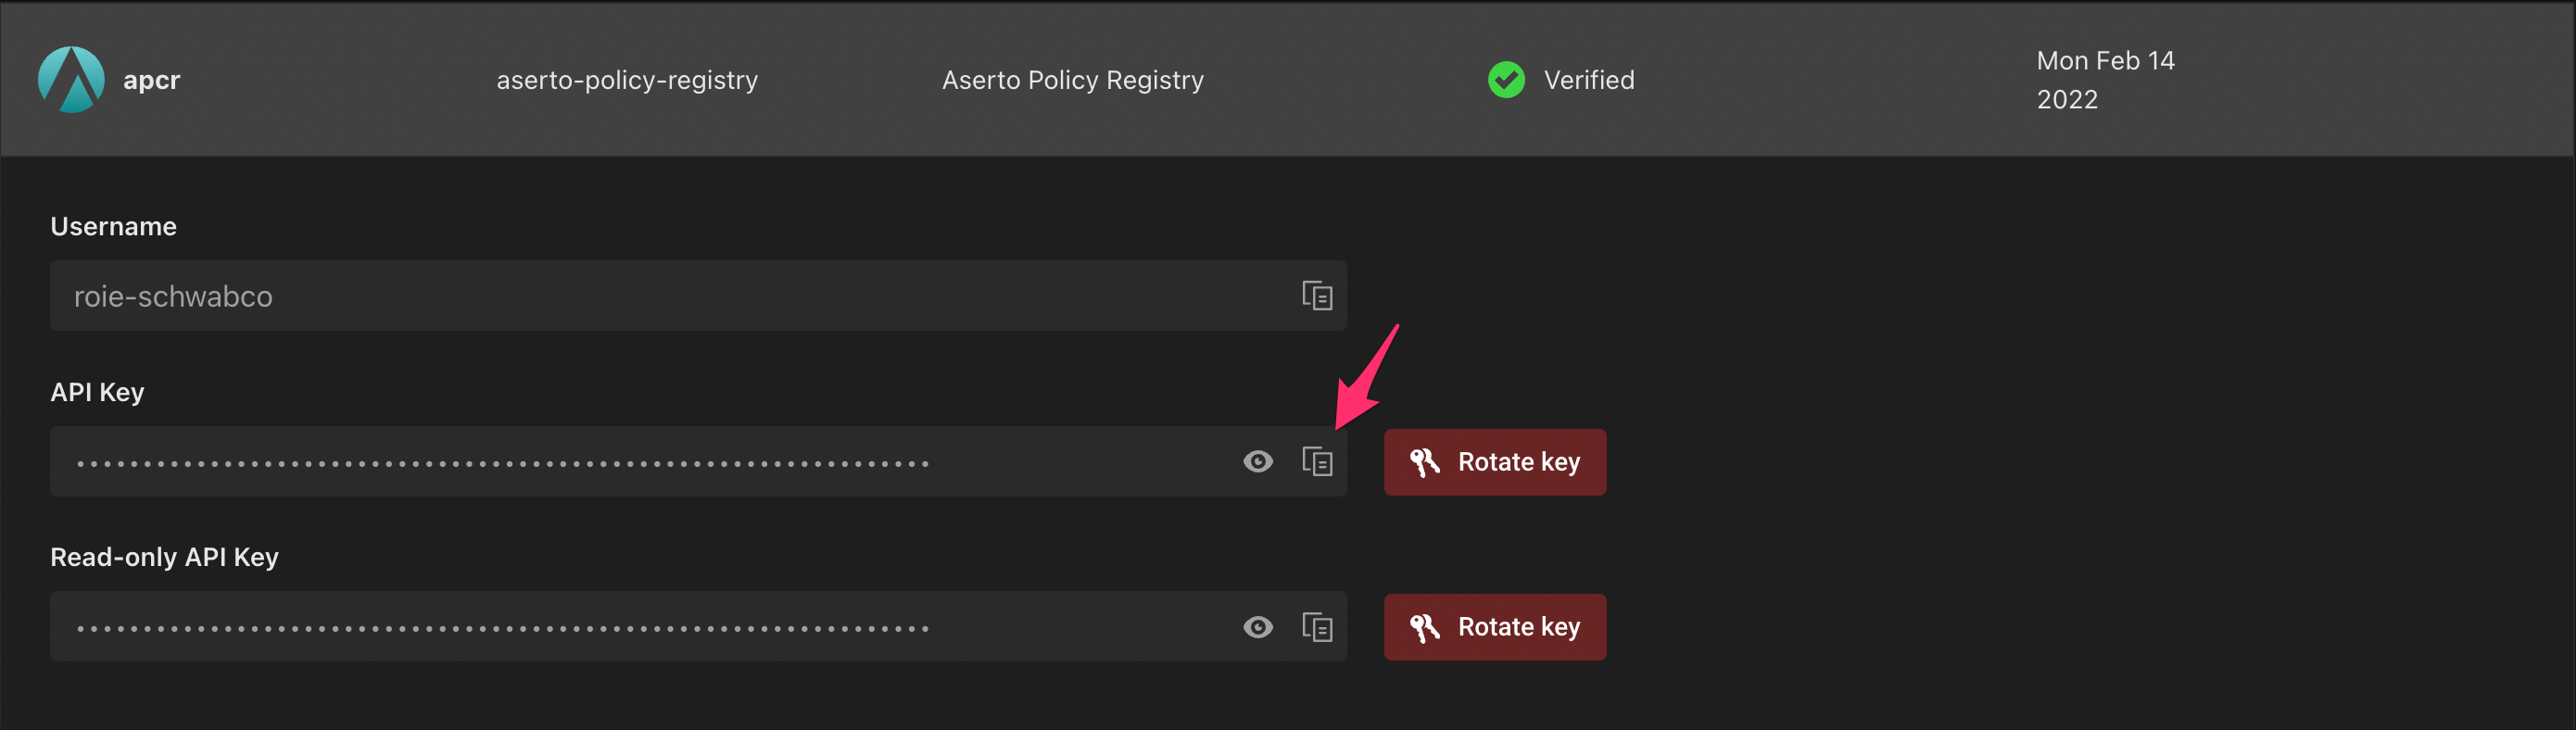
To connect to the Aserto Container Registry, use the path registry.prod.aserto.com.
The APCR API Key is found in the Connections tab under the "apcr" connection:
Build
To build a policy image, use the policy build command. Then, tag your built image by using the policy tag command.
policy build . -t my-org/my-policy:v0.1.2
policy tag my-org/my-policy:v0.1.2 my-org/my-policy:latest
Publish
To publish a built policy image to the policy registry, use the policy push command:
policy push my-org/my-policy:v0.1.2
Pull
Using the policy CLI, you can pull a policy image from a Policy Repository just like you pull a docker image.
policy pull my-org/my-policy:v0.1.2
GitHub / GitLab Actions
Policy repositories generated by Aserto include GitHub/GitLab Actions which automatically build and push new policy images to the Aserto Container Registry when a new tag is pushed to the repository.
git commit -am 'new policy version'
git tag v0.1.2 && git push --tags
Manual Setup for GitHub / GitLab Actions
In order to set up GitHub Actions manually, use the policy CLI and run the following command to initialize a new policy repository:
policy templates apply github-policy-ci

policy templates apply gitlab-policy-ci
Initially you'll have to select the policy registry you'd like to use:
  #  SERVER
  1  registry.prod.aserto.com

> Select server#:
Select the registry.prod.aserto.com server. Next, provide your GitHub username, for example:
> user (): rschwabco
Next, you'll be asked to provide the name of the GitHub secret that will be used to push the policy image to the registry.
> secret name (TOKEN):
Use the name ASERTO_PUSH_KEY (this name is used by the Aserto console as well, and would make it easier to allow the workflow to work with the console if you eventually choose to do so). Note that you'll need to use this secret name when you create the secret in your GitHub repository.
Finally, you'll be asked to provide the GitHub organization and repository you'll be using. For example:
> org/repo: rschwabco/policy-test
Once completed, the CLI will generate a .github folder for GitHub, or a gitlab-ci.yaml file, which will include the workflow required to build and push policy changes to the Aserto Container Registry whenever a new tag is pushed to the GitHub repository.
To complete the setup, head to the Aserto console and retrieve the Aserto Policy Registry API key. Head to the Connections tab, and click on "Aserto Policy Registry".
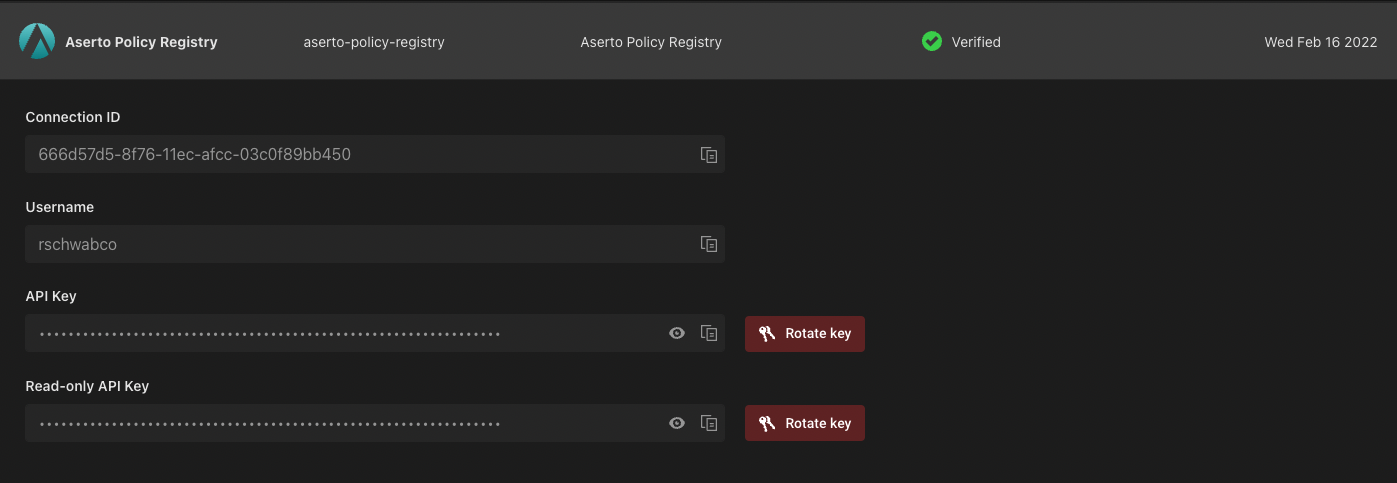
Copy the API key, and head to the GitHub / GitLab repository you just created. In the repository, click on the "Settings" tab, click on "Secrets" and then select the "Actions" tab. Create a new secret with the same secret name you set (e.g., "ASERTO_PUSH_KEY") and paste the Aserto Policy Registry API key as its value.
For example, for GitHub:
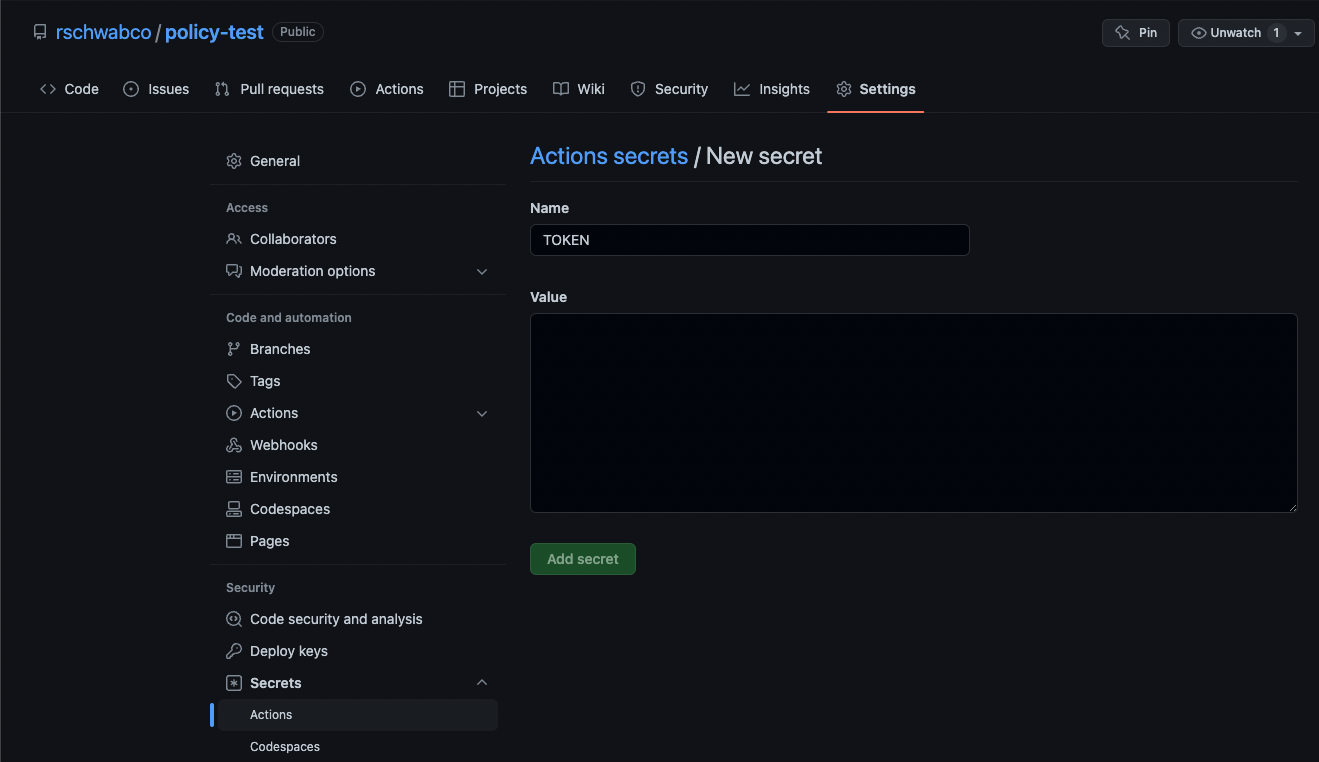
Click on "Add secret" to save the secret. Your GitHub repository is now ready to push policy changes to the Aserto Policy Registry.
Run
To run a policy, you need to create a policy instance which is an instance of the decision engine's runtime associated with a tagged version of a policy. You can create multiple policy instances, each associated with a different version of a policy.
To create a policy instance, open the "Policies" tab in the Aserto console, and click "Create an instance":

Next, you'll be prompted to select a policy registry:
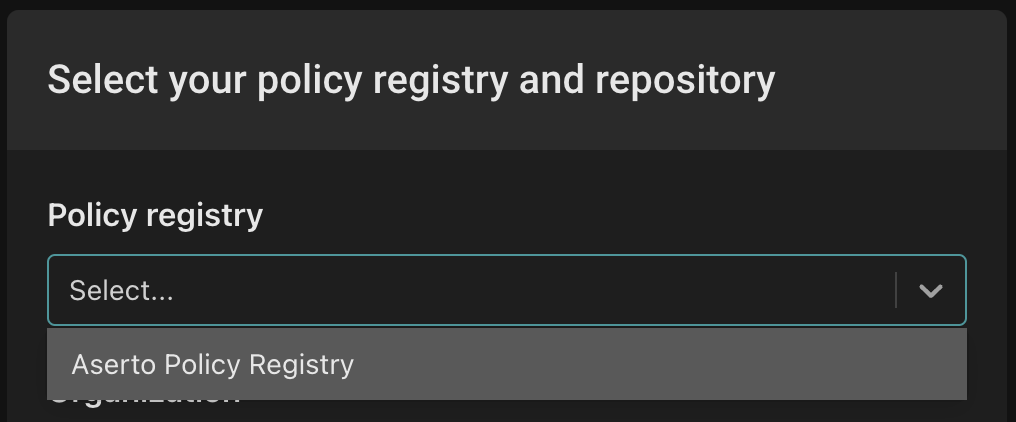
Select the policy registry you'd like to use from the dropdown.
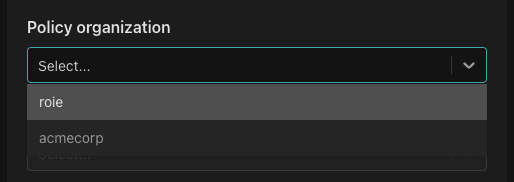
Then, you'll be prompted to select a Policy organization. Choose the organization under which you created your repository.
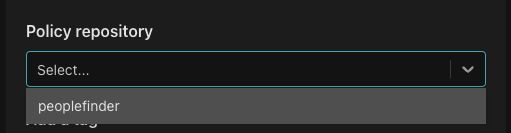
Next, select the policy repository you want to associate with the policy instance.
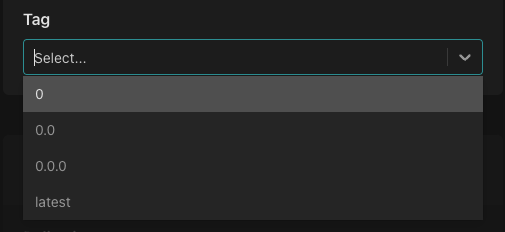
Select the tag you'd like to associate with the policy instance.
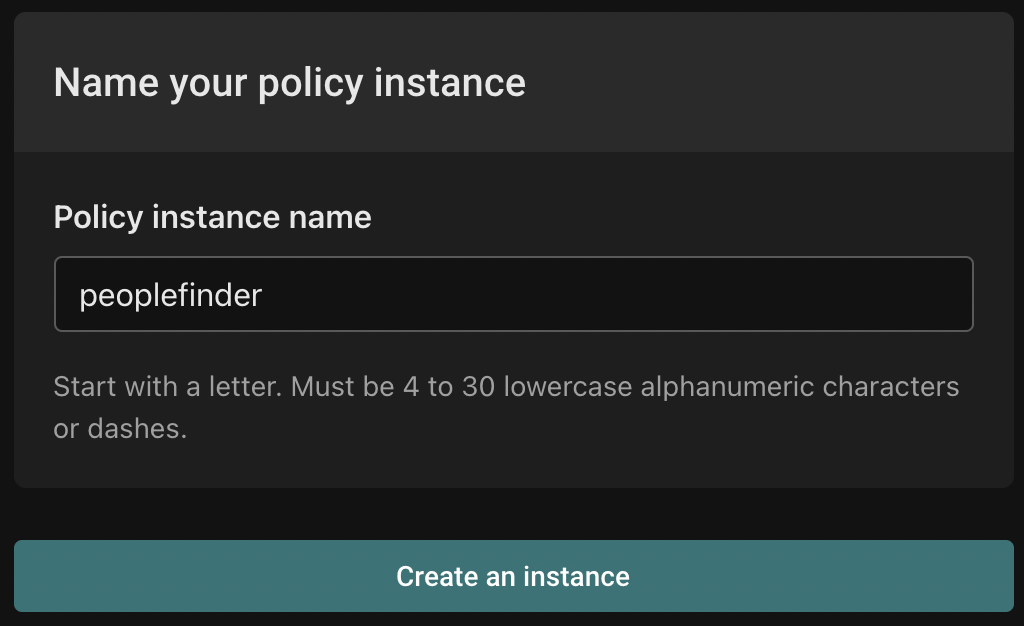
Finally, name your policy instance and click "Create an instance".
Consume
An application that wants to authorize a user's access to a resource based on the policy can call the policy instance, passing it the policy, decision(s), user context, and resource context, and the policy instance will evaluate the policy with the provided inputs and returns the boolean value(s) of the requested decision(s), allowing the application to definitively check whether the user has access to the resource based on the given policy.
The authz.is API is the underlying mechanism for an application to call the policy instance to make a decision. The language SDKs provide higher-level abstractions for interacting with policy instances.