Managing Policies
The underpinning of Aserto's authorization model is the policy.
Policies are authored, stored, and versioned as code in a git repository.
A policy instance is an instance of the decision engine's runtime associated with a tagged version of a policy. You can create multiple policy instances, each associated with a different version of a policy.
To create a policy instance, you must first create a policy repository. Once the policy repository is set up, you can create a policy instance and associate it with a tag in the policy repository.
Currently, GitHub is the only supported source for policy repositories. More to come!
Add a policy repository
To add a policy repository, navigate the Registry tab and click "Create a new policy"

When you click on “Create a new repository", you'll go through a short workflow to select a git repository for your policy, and name that policy repository in the Aserto console.
Initially, you'll be asked to either use a template or create an empty repository:
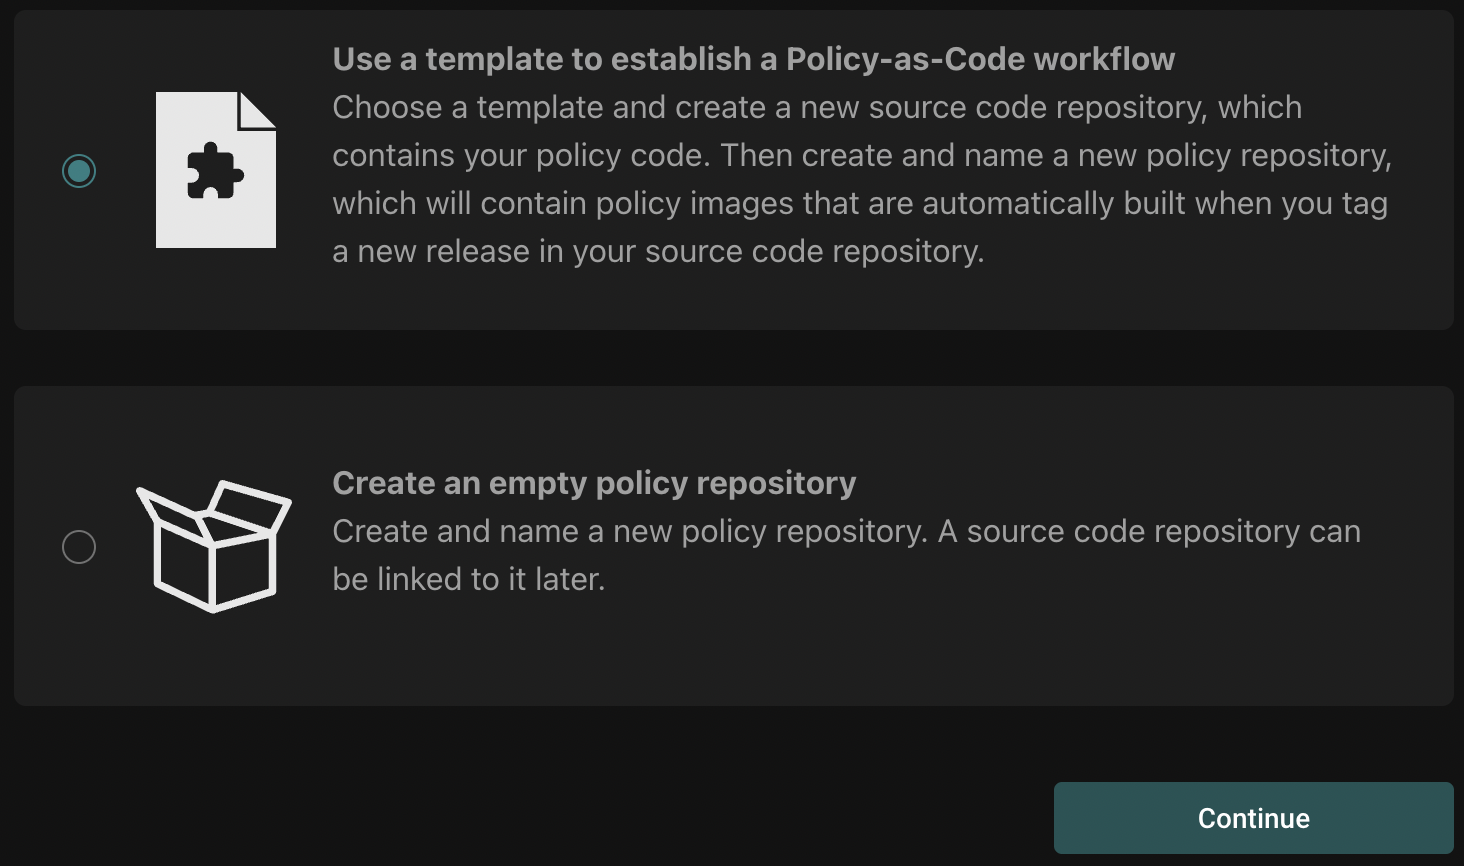
Creating a policy repository from a template
If you choose to create a policy from a template, you'll be asked to select a connection to a source code control system. If you don't have any yet, follow the instructions to create one.

Next, you'll select the template you want to use, the organization under which the policy repository will be created and the name of the policy repository (as it will be created in the source code provider).
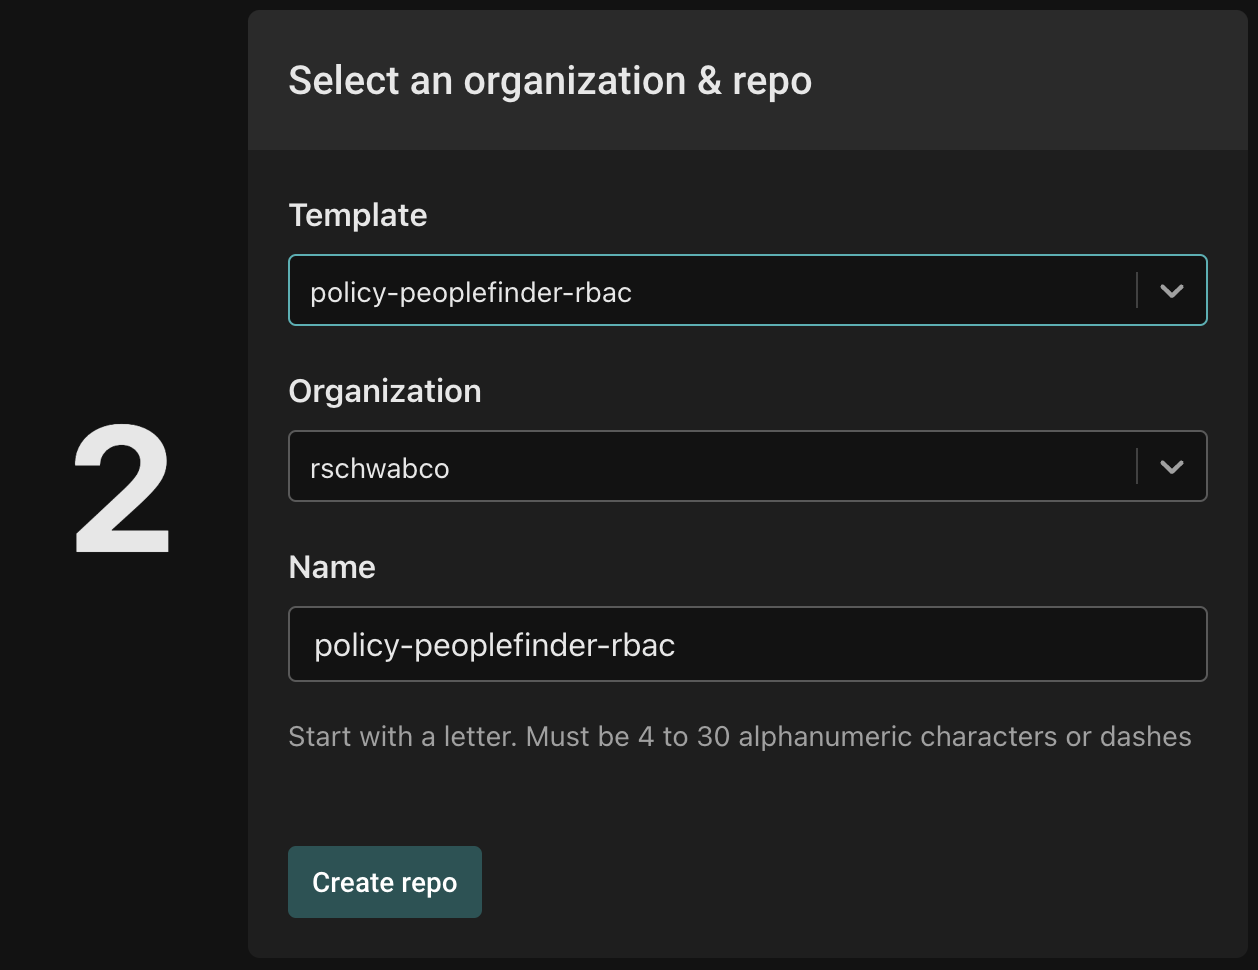
Name your new repository with the prefix policy- (for example, policy-peoplefinder-rbac). This will clone the template to the organization and repository name that you selected. The repository will have the right GitHub Action installed, so that when you tag a commit, a new policy image will automatically be built and pushed to the Aserto Registry. See the Policy Lifecycle topic for more information.
Next, name the policy repository with a descriptive name (e.g. peoplefinder).
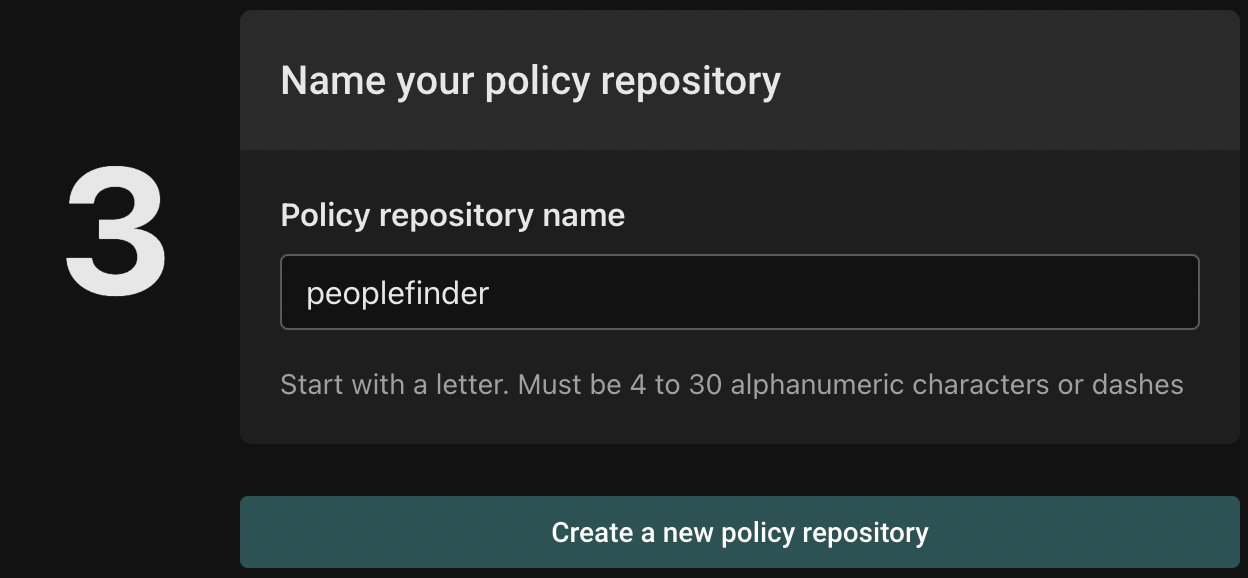
Finally, click "Create a new policy repository" to complete the process.
Creating an empty policy repository
If you choose to create an empty policy repository, you'll see the following:
Choose a descriptive name for your policy repository, and click "Create a new policy repository". You'll see the policy repository list:
Click on the policy you created, and the following view will be shown:
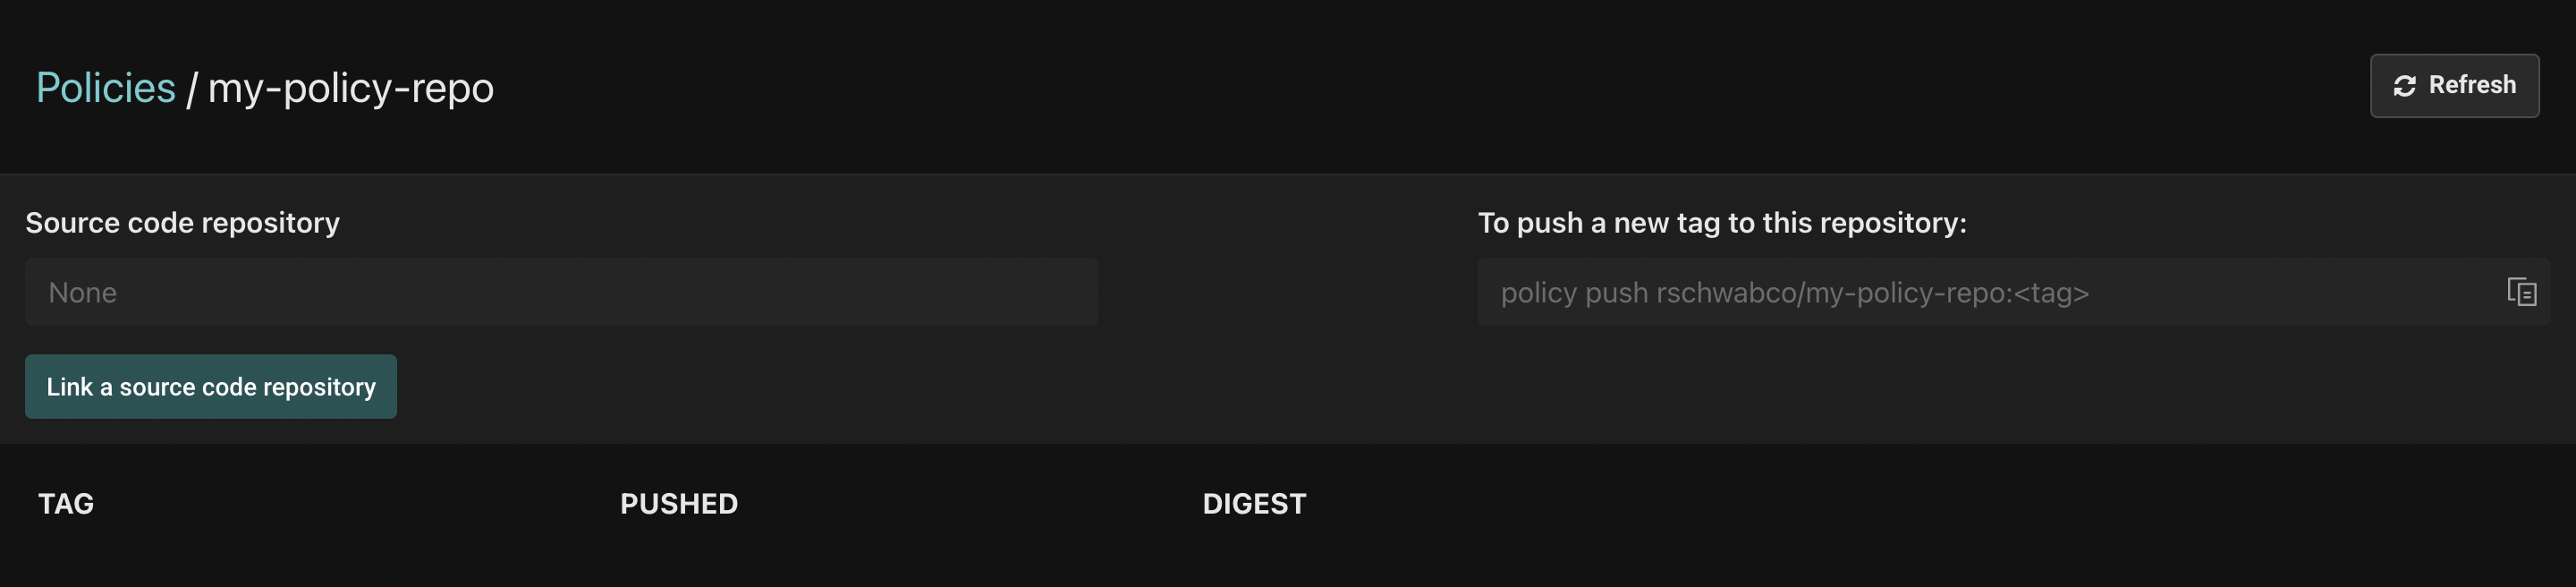
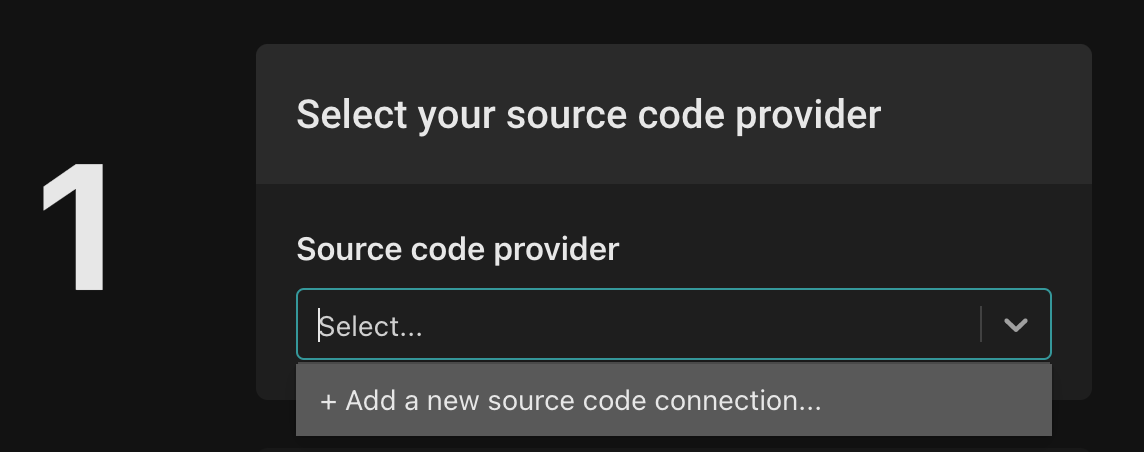
Click the "Link a source code repository" button. First, you'll be asked to select your source code provider. If you don't have any yet, follow the instructions to create one.
Next, select the source control organization for the repository. You can choose to use an existing repository or to use a template.
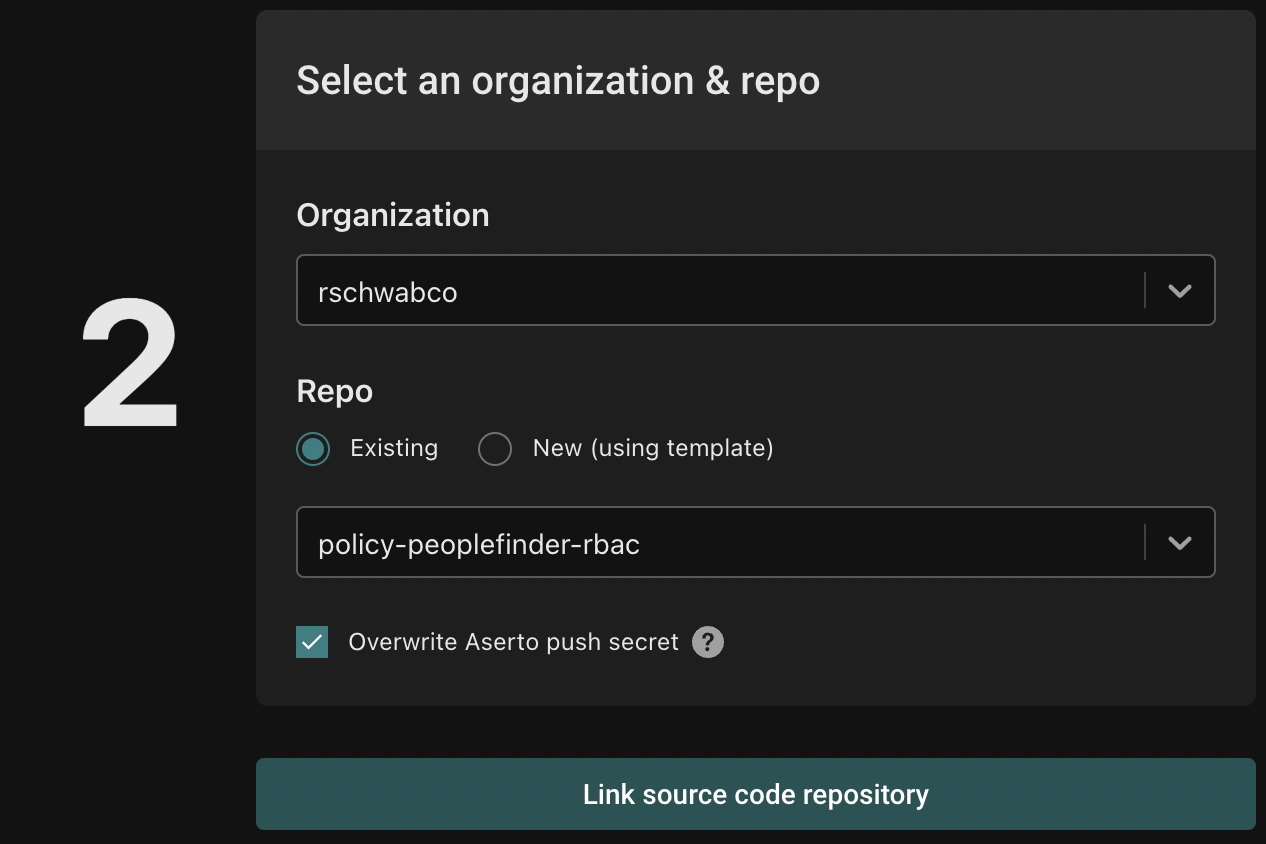
To complete the process, click "Link a source code repository".
Policy repository details
Once you have one or more policy repositories created, you'll see the list of all the policy repositories in the organization:
You can click on each policy repository and view its details:
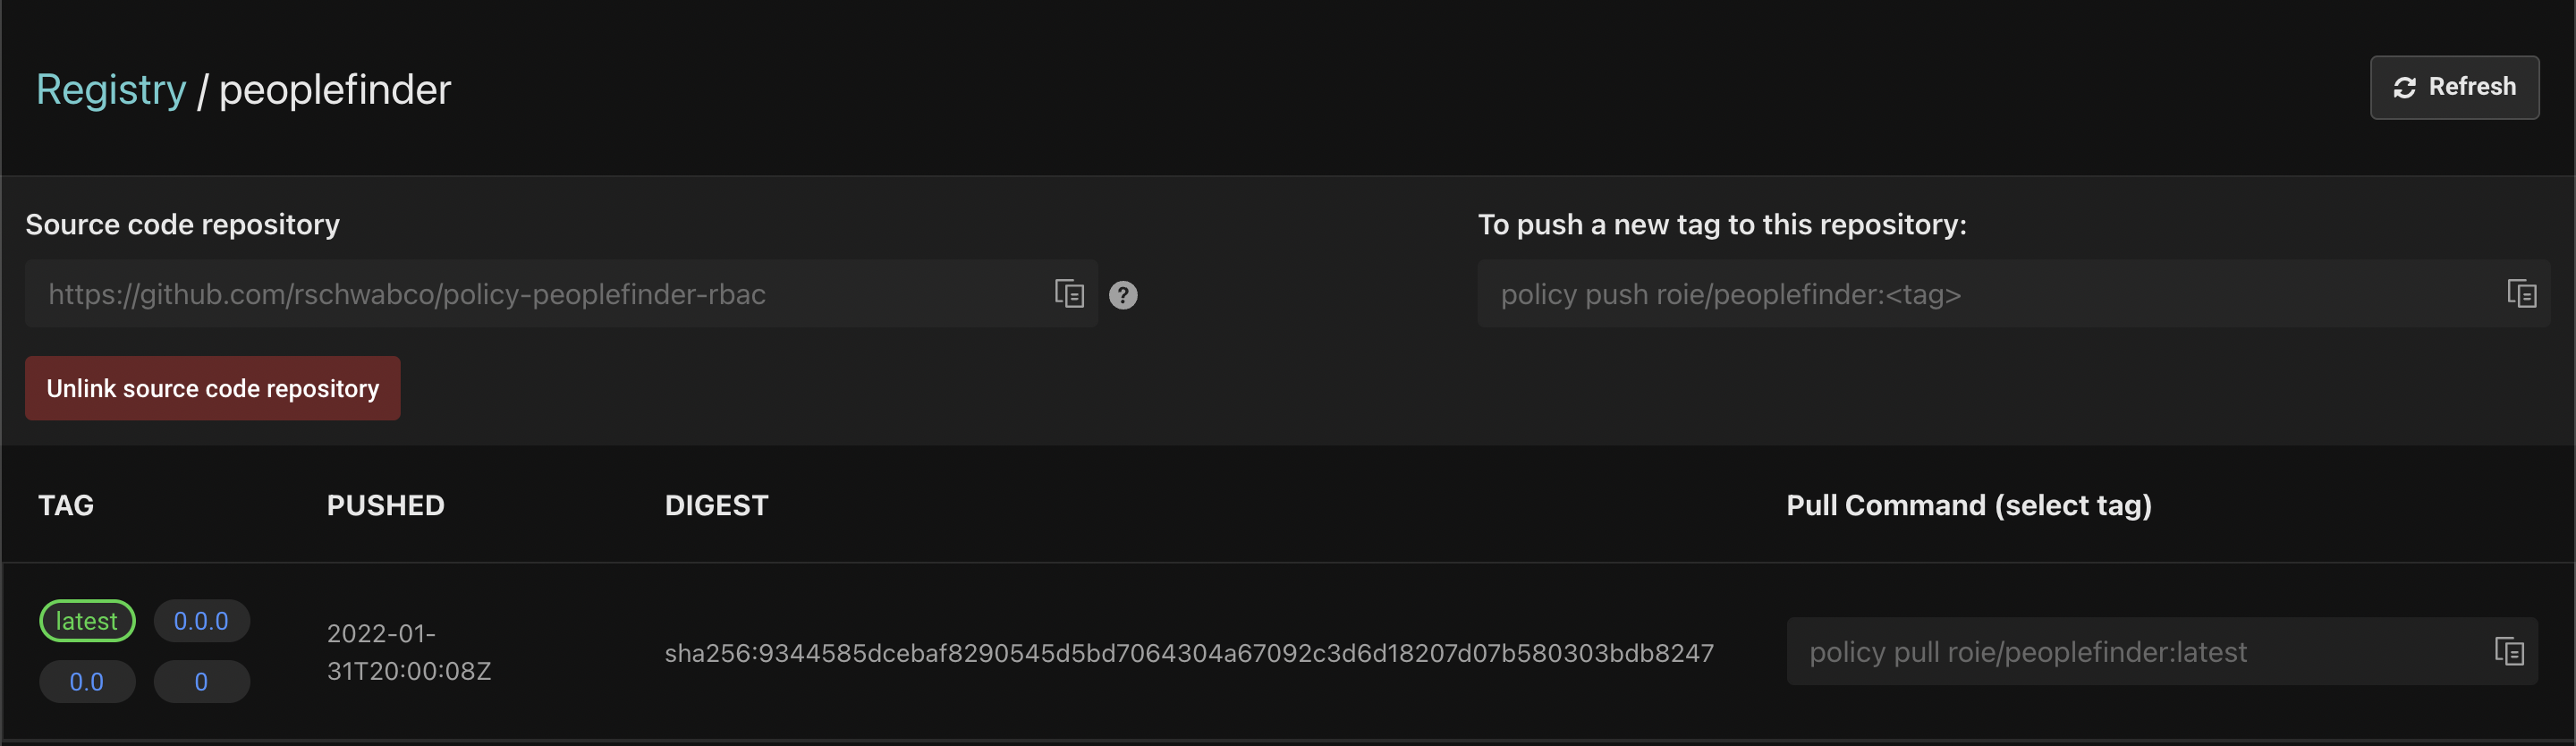
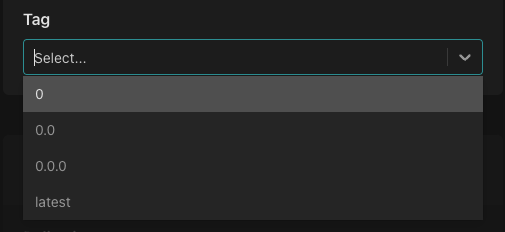
Aserto automatically creates four tags for your repository:
- latest - Represents the latest version of the policy. An policy instance associated with this tag will always reflect the latest tag pushed to the repository.
- 0.0.0 - The patch version of the policy. This tells the policy instance to use this specific version of the policy.
- 0.0 - The minor version of the policy. The latest patch version under the minor version will be included in this policy. For example, if you create a
0.0.1tag, any policy instance associated with the0.0tag will reflect the latest patch version change. - 0 - The major version of the policy. The latest minor and patch versions under the major will be applied. For example, if you create a
0.1or0.0.1tag, any policy instance associated with the0tag will reflect the latest minor and patch version change.
Create a policy instance
After setting up a policy repository, you can create a policy instance. Open the "Policies" tab in the Aserto console, and click "Create an instance":

Next, you'll be prompted to select a policy registry:
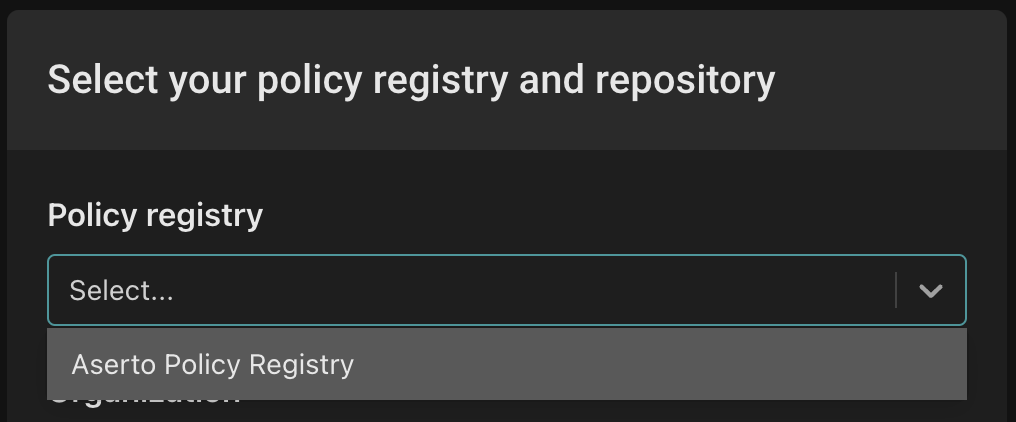
Select "Aserto Policy Registry" from the dropdown.
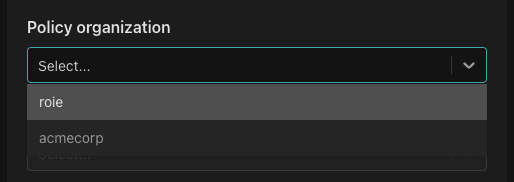
Then, you'll be prompted to select a Policy organization. Choose the organization under which you created your repository.
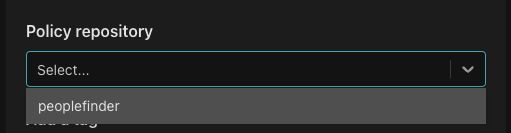
Next, select the policy repository you want to associate with the policy instance.
Select the tag you'd like to associate with the policy instance.
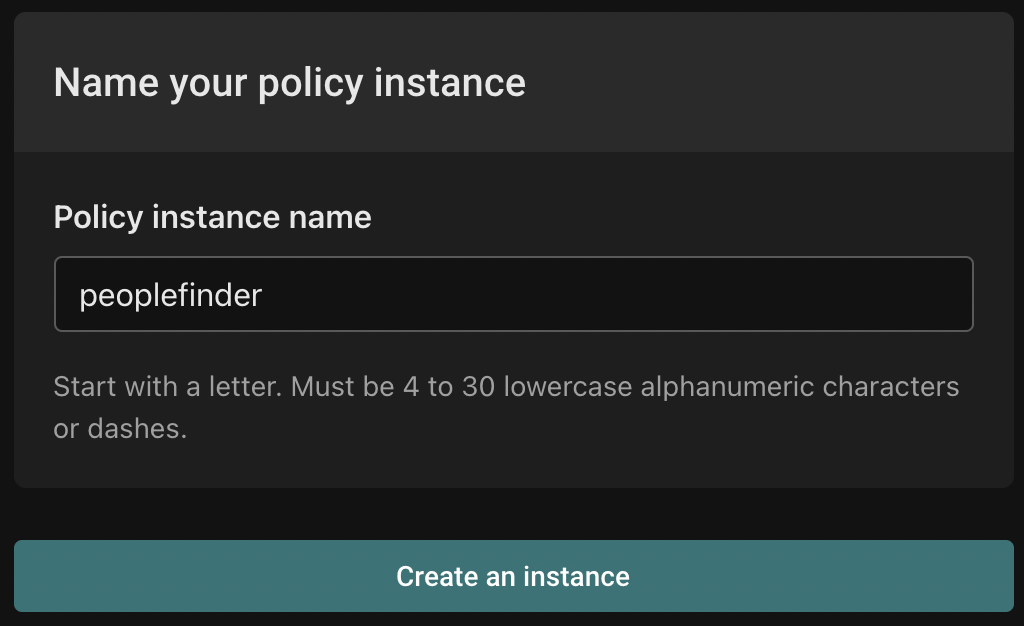
Finally, name your policy instance and click "Create an instance".
Remove a policy repository
In the policy repository list, click the ellipsis on the right side of the policy repository, and click "Delete repository".

Note that removing a policy from your Aserto organization doesn't remove the source code repository. To remove the repository from your git provider, use that provider's API or UI.
Remove a policy instance
In the Policies tab, click on the X at the top right of any policy instance to remove it.